

Mari Tutorials: The Ultimate List Of Videos & Courses On Foundry’s Mari Software
Mari is a dedicated 3D texture painting program that was designed to handle high-resolution textures and models.
Initially developed by WETA Digital for demanding VFX films such as Jame Cameron’s Avatar, Mari is now commercially available to all artists and distributed by Foundry.
In this massive list you’ll find dozens of tutorials covering Mari’s complete toolset with tips on managing textures, projection painting, and finalizing work for import.
For Photoshop users, Mari’s workflow will feel familiar such as using adjustment layers.
After watching these tutorials you’ll easily have enough skills to texture a digital double or a complicated prop that can withstand any close-up shot.
Introduction to Mari
To kick things off we have this free video teaching the fundamentals of Mari from creating materials to importing high-quality textures and painting your model.
Mari is packed with features but the authors reassure you that you don’t need to know everything to get started.
You’ll learn how Mari works from its UDIM system to its quirky navigation. It might leave you looking to modify preferences based on how you work, or you’ll be constantly pressing Ctrl+R to reset the view whenever you go off axis. This video can help.
You’ll also learn tips and tricks to speed up this workflow such as running a dedicated Solid State Drive specifically for Mari or painting in orthographic view to prevent perspective distortions.
The Freelancer’s Guide to Mari
In its earlier releases, Mari was only used in big VFX studios.
However with the rapid advances in CPU/GPU technology a typical workstation can run Mari with no hiccup.
This video brings that pro-level workflow right to you for free where you’ll learn production-proven techniques that will prepare you for any Mari job.
You’ll learn various features such as the layer and channel systems that slightly resemble Photoshop’s workflow. You’ll also dive into the stack system that allows you to create complicated masks to accommodate complex textures.
Mari even has a dedicated image manager tool. It might look like a gloried file system but it offers more flexibility such as cropping an image and resizing right within the manager window.
Along the way you’ll learn about different tools and commands under the projection, painting and light palettes.
The author Timothy Hanson has a history of teaching VFX work and you can check out more texturing tutorials on his website.
Mari UI Tutorial
At a glance you might notice that Mari does not have an intuitive user interface.
It makes sense to veterans but the software will leave beginners scratching their heads. This is exactly why you’d watch a UI tutorial like this one.
Here you’ll learn how to navigate within Mari even as a newbie. You learn the various toolbars across the workspace such as the paint buffer, view transform, and canvas toolbars.
If you’re looking for dedicated Mari texturing tutorials be sure to browse through this author’s website too.
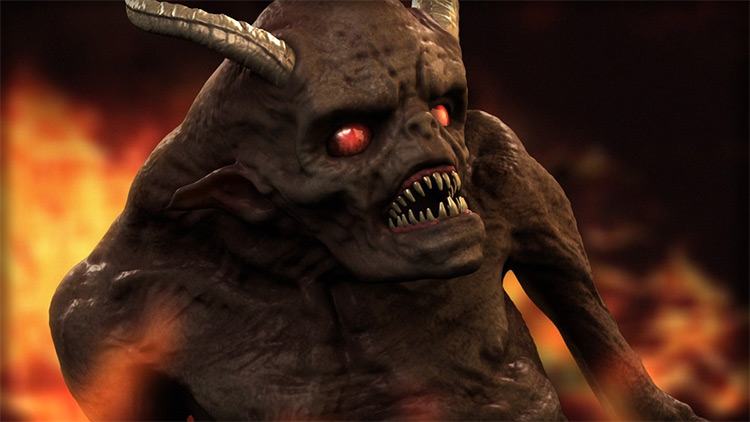
The Best Way of Detailing Characters
In this tutorial you’ll learn how to put details onto characters at a level equivalent to feature film standards.
While anyone can pick up Mari within a week or so, it will take time to able to detail an asset that can hold up to close scrutiny.
But with this awesome video guide you’ll learn production-proven techniques for an effective Mari workflow. You’ll be using Mari with high-density models and high-resolution textures; just as it was designed to be.
You’ll also learn how to use maps from texturing.xyz, a dedicated site that provides skin details for low, mid, and high frequencies for all types of artists.
Also be sure to check out part 2 which completes the tutorial.
MARI and the Texturing Pipeline
This is not a step-by-step tutorial but rather a presentation on how artists from the Ready at Dawn Studios textured their original IP PS4 game: The Order: 1886.
Mari was used throughout the process on various assets such as characters, creatures, weapons, and props.
The presentation starts with texturing one of the lead characters.
The scanned model is imported and cleaned in Mari. You’ll witness how to remove a hair texture and replace it with a skin patch using the clone tool, all with the help of an adjustment layer to even out the tone.
Among the reasons that studios use Mari are the integrations to Photoshop, accurate painting to UV borders, and vector visualization.
You’ll also learn a unique way to use Mari for flow maps to generate proper anisotropy for a horse’s fur. Incredibly detailed and a ton to learn here.
Texturing Workflows In Mari
In this demonstration you’ll catch a glimpse of the texturing workflow used on a film-quality asset.
The presenter stresses that this project begins not necessarily on painting, but much like cooking, the process starts at organizing your assets.
Some of the organization tips mentioned are to use folders and shared layers, this way changes update immediately to other channels.
You’ll also learn how to add versions on your projects for proper tracking and to freeze the viewport shader calculation for faster navigation.
There is no universal secret in creating a realistic texture other than creating a decent base and breaking it up with various masks and stacking them up against each other. How you get there is another story.
Projection in Mari
Without a doubt, Mari’s flagship feature is texture painting.
And we all know the best way to learn is through practice so here’s a fantastic place to start. With this video you learn to texture a human face.
You’ll start by importing a low poly object and subdividing it within Mari.
You’ll create a base skin color and begin texturing on the forehead, eyelid, and mouth. You’ll also learn commonly used shortcuts to speed up your workflow as well as techniques on how to blend textures to create a seamless output.
Substance Painter to Mari
In many ways Substance Painter and Mari are competing programs.
However each has specific advantages and niches to serve. With this video you’ll learn how to use the two programs together to get the best of both worlds.
In the first section you’ll be setting the project in Substance Painter for baking where you’ll go over the pertinent settings such as output size and max ray distance, among other things.
In the second section you’ll be importing the baked textures for Mari and learning a whole workflow from scratch.
Mari Texturing Livestream
This acts more like a general overview of how experienced artists approach an asset for texturing.
The stream features Paul Paulino, a texture artist from Method Studios who wrote extensive topics with Mari on his website.
In the first part of this stream Paul shares his journey and gives portfolio advice for any aspiring 3D artist, such as giving proper attention to UV layouts.
Through the video Paul shows how he textured a gumball machine from scratch. He shows several tips on how to achieve a realistic material by avoiding a procedural look. Paul also uses RGB, ambient occlusion, and curvature maps to isolate a specific section of his model.
New Techniques In Mari 4
At the time of this writing Mari 4 is the latest version of the software. But even newer versions will likely include many of these techniques.
With this demo you’ll get up to speed on Mari’s newest updated workflows.
You’ll navigate within the slightly revamped user interface to learn the newer tricks of the trade.
Basically you’re creating procedural materials and creating a relationship within the affected textures. You’ll be also creating triplanar materials that can be shared on multiple channels. You’ll also learn how to generate dust and grime for your assets, a very handy skill to keep in your 3D toolbox.
Texturing Game Assets in Mari
It’s a given that Mari can handle high poly models. But how about low poly models for games?
That was a trick question: Of course! Mari can absolutely texture low poly models.
With this tutorial you’ll learn several specific workflows for games inside Mari such as using multi-material physically based rendering assets. After the session you’ll learn how Mari handles color management and why it’s so important for games.
You’ll also learn how to use an ID map to isolate a specific part of your asset for detailed texturing.
You can also bake ambient occlusion maps using the MODO bridge feature inside Mari.
Finally you’ll clean-up the textures for export to the Unreal Game Engine.
Metal Armor for Production
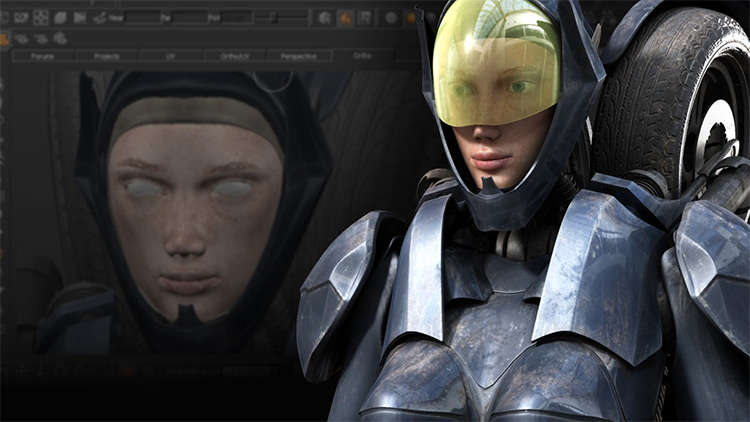
Armor is great practice for anyone designing characters from scratch. Here you’ll be texturing a female cyborg.
This all starts with set-up for the asset’s UV to have an optimized map. You’ll learn several techniques such as mirroring and the patch tools to immediately populate your texture map.
Finally you’ll use these maps in a shader to render a final image.
You’ll also use several programs such as Maya and Photoshop to complement this Mari texturing workflow.
Ptex Texturing
Ptex is a texture mapping system developed by Walt Disney Animation Studios.
Ptex was designed to replace the UV mapping system where it can be a bottleneck in the studio’s workflow.
Unlike UV which needs an additional step for unwrapping, Ptex is somewhat of a plug and play solution.
While Ptex has been released for quite some time, only a few applications have adopted the system. Fortunately Mari has a dedicated workflow for the Ptex set-up and it’s awesome.
In this tutorial you learn the advantages of Ptex and how to deal with this new and curious workflow.
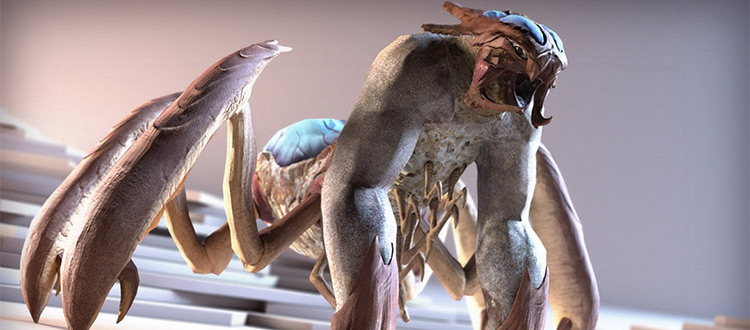
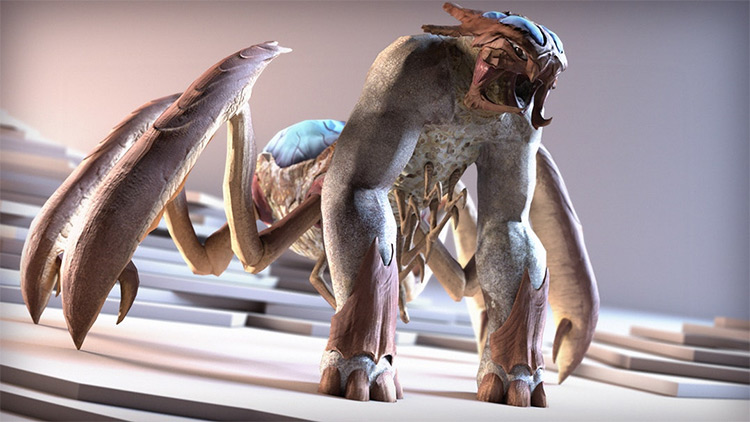
Strategies for Hand Painting Textures
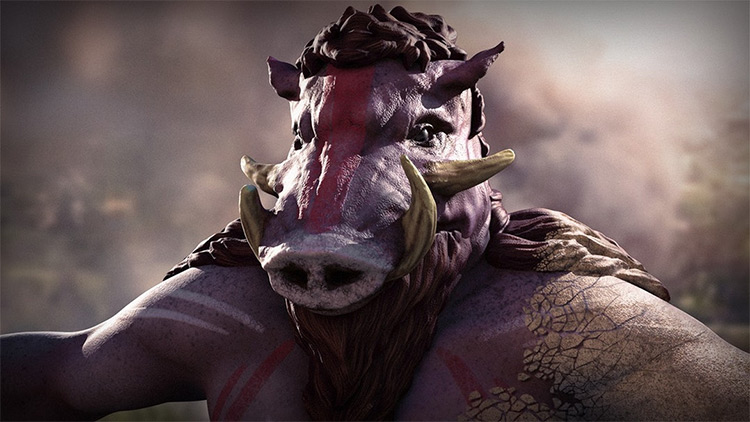
While Mari is capable of creating assets using procedural textures, you’ll still need an artist’s touch to take your assets to the next level.
So in this detailed video course you’ll be texturing a warthog warrior creature that will take you through the complete process.
You’ll start by importing the model, setting up your environment, and creating a shader.
You’ll also create the necessary texture maps such as diffuse, specular, and gloss, among a few others. There’s a bunch of great tips in here on how to speed up your workflow by setting up a color palette in Mari.
Then near the end of the course you’ll export the finished textures for other applications. Definitely worth the price or even a free subscription to Pluralsight just to access this course if you’re studying Mari.
Pipeline Between Mari and ZBrush
One of the best Mari skills you can develop is how to integrate ZBrush with your Mari texturing workflow.
These two programs are a perfect combo with ZBrush creating the highly detailed models and Mari creating the highly detailed textures.
For the ZBrush section you’ll learn how to prepare a complete sculpt for texturing. You’ll use the Decimation Master plugin to convert high poly to low poly, then ZRemesher to generate a model with quads and then UV layout for UV mapping.
For the Mari section you’ll create a project that accommodates for a UV and Ptex workflow. You’ll setup materials and channels for painting all from scratch. Near the end you’ll export your textures for further manipulation as needed.
Such an incredible production-level course that covers so much of what 3D artists encounter on a regular basis. If you have any interest working with Mari in a studio or as an indie developer then this course is for you.
Side note: if you don’t have any experience with ZBrush then you might have a look at our ZBrush tutorials list just to get you started there.
Author: Ben Traje
Ben is a stylized character rigger based in Davao City, Philippines. Proficient in Maxon, Cinema4D, and Autodesk Maya, he's available for remote freelance work with plenty of samples in his portfolio.

")

")


