

Best Maya Tutorials On 3D Modeling & Animation (Free + Premium)
Maya’s intimidating user interface might throw beginners off-track. But that’s what we’re here for!
These tutorials offer topics for both beginners and advanced 3D users alike. They are also available totally free on YouTube or with paid options.
Don’t worry if some of these tutorials are “dated” as Maya has more or less matured in the past decade. As such, a tutorial from 2010 can still apply to the latest version of the software.
From these videos you will learn the majority of Maya’s features covering all tasks in the production phase. You’ll also come to understand why Maya became a de-facto standard for the 3D industry.
Adding Maya to your toolset will certainly make you a valuable member of any creative team.
Free Tutorials
Maya For Beginners
In this tutorial you’ll have a general overview on how to tame Maya.
You will get a hands-on of the commonly used tools and how to navigate the user interface.
Plus you’ll dip your toes into modeling by creating and modifying polygons with the use of the modeling toolkit and bevel tool, among others. Afterwards you’ll learn how to texture your models by creating and assigning materials using the powerful hyper shade editor.
The texturing inputs can either be procedural or image-based maps.
Then you learn to use various light types such as spot and point lights to illuminate your scene. And lastly you’ll render that image to completion.
If you’re in a rush to learn the basics this 40-minute tutorial will make your time worthwhile.
Bodybuilder Character Modeling
Before the title misleads you: the techniques used here are applicable to many other body types.
However let me preface that character modeling, in general, is aimed more for intermediate users.
The reason is you’ll be juggling the technical aspect(workflow techniques) and the artistic aspect(anatomy and appeal) together.
Fortunately the author here offers an easy to follow approach. You’ll start with simple primitives to block your character. You’ll also learn several production techniques to make the process as painless as possible.
As characters are usually made for animation, you’ll also learn how to maintain topology concepts for proper deformation.
Be sure to download the free source files to follow along.
Create a Chess Piece
In the previous tutorials you were creating and modifying polygon objects to create a model.
In this tutorial you’ll learn how to create a model using a NURBS surface object. It’s not necessarily better than a polygon object but it does offer several advantages.
You’ll use the CV Curve tool to create a curve profile and later revolve it around an axis to create a model. The technique is most commonly used in creating a circular symmetrical object such as a vase or a candlestick.
If you intend to further modify the NURBS surface object you can freely convert it to a polygon object. The author created a separate tutorial for such a task.
Maya Modelling Secrets
Maya was first and foremost developed with animation in mind. Yet over the years Maya has become a decent modeling contender against other modeling applications.
In this 15-minute tutorial the authors show production-proven techniques that are useful not only for new users but also for veterans.
You’ll learn the benefit of using hotkeys and marking menus for your workflow.
Marking menus of your own actually sets Maya apart from the competition. You don’t need to memorize every shortcut in the software as you can access commands with contextual menus.
You’ll also discover several useful commands such as using the circularize tool, using the edge flow tool for retopology, or holding the tab key to toggle between a marque and drag selection mode.
Character Rigging
Before you delve into animation you need to rig your characters.
Character rigging is the most technical part of Maya, right next to scripting/programming.
It’s not surprising that most students do not see it as a career. It’s tedious and somewhat boring. But it doesn’t have to be.
In this three-part tutorial series you will have a strong learning experience with the author’s engaging approach. You will learn the proper creation, placement, and orientation of joints for rigs.
The latter in particular, joint orientation, is the most common mistake we see with beginner rigs.
Maybe because Maya handles it differently than other applications. Needless to say, this concept must be understood to avoid potential problems down the pipeline.
By the end of the tutorial you will be confident in rigging your own simple character.
Don’t forget to download the accompanied files so you can follow along as well. Be sure to check out part 2 and part 3 to get the most out of the tutorial.
Rigging the Pixar Desk Lamp
Almost every Pixar animation internship reel includes the iconic Luxo desk lamp.
Fortunately rigging the lamp is not as complicated as rigging a character.
You’ll be using the Inverse Kinematics (IK) system instead for the typical Forward Kinematics (FK) system. With this set-up you’ll be able to squash and stretch the lamp’s body with one control.
You’ll also be using a pole vector constraint to control the angle of the IK handle.
Finally you learn some clean-up techniques to get ready for animation such as hiding the IK Handle and putting objects into a layer system to prevent accidental selection.
Quadruped Rigging
So here you learn how to rig a basic quadruped.
While several techniques from the biped character are applicable, the 4-legged creature requires a slightly different set-up to accommodate its anatomy.
Quadrupeds present different body mechanics than a biped. For instance, the front phalange will move back and forth while the back phalange will only move front. Your foot controls should accommodate accordingly.
In addition you can also add realistic anatomy constraints. In most quadrupeds the back legs don’t straighten, unlike the front legs.
Learning quadruped rigging is also a good introduction to creature rigging as a whole.
Face Rigging (Joints & Skinning)
Out of all the body parts, the face takes the longest amount of time in rigging.
A face requires great attention to detail to represent various expressions.
Before moving onto this tutorial you need to have a basic knowledge of joints and skinning.
If you aren’t strong in those areas you can check out the author’s previous video here.
Like joints for the human body, joints for the face must be purposeful.
They must be placed where it accommodates the model’s topology. Later in the video you’ll learn how to paint skin weights to ensure proper deformation.
Be sure to check out the videos in this series as it tackles essential topics such as set driven keys.
Rigging a Car
In this three-part rigging tutorial you’ll learn the subtleties of rigging a car.
You don’t need to be a car aficionado to work on this one. A healthy dose of curiosity and patience will do.
The car model provided might not look like much but it contains a plethora of rigging problems. You’ll also learn how to adopt the set-up to accommodate different types of 4-wheeled vehicles.
The author provides the projects files for you to follow along with in detail.
Texturing in Maya
Texturing in 3D does not mean slapping on several image maps and call it a day.
You need to prepare your model first. You need a solid understanding of the concept of UV (well, unless Ptex takes over).
With this tutorial you’ll study several projection methods such as planar and cylindrical options.
You will then lay-out and unfold your UV map which is a crucial part of 3D work. Be sure to also take a note of the texture websites mentioned. They will come in handy in future projects.
Low-Poly Sword Modeling
Planning to populate a weapon arsenal? Look no further than this free tutorial which teaches you how to model a low-poly sword.
You will learn how to optimize your geometry and add edges only where it matters.
This is a multi-part tutorial series so it can be long. Be sure to check the rest of the entry if you want to work till completion. You can also download the source files.
Maya Animation for Beginners
In this comprehensive tutorial you learn how to animate in 3D.
While it is not as straightforward as 2D where you just pick up a pen and grind through your papers, 3D animation offers a degree of flexibility where you don’t have to redraw an entire image when you want to modify the timing.
You will specifically learn how to add and remove keyframes, the backbone of every digital animation.
Keyframes also allow you to in-between your animation to speed up your workflow.
You will also dive in with the graph editor where you utilize several tangent types such as spline and stepped. Tangent types specify how your keyframes interpolate between each other and it’s something you’ll understand the more you practice.
Simple Walk Cycle
If you are now comfortable with Maya’s animation toolset you can move into body mechanics starting with the walk cycle.
In hindsight, the walk cycle is simple.
However for a beginner it might take some time to really understand it.
A walk cycle is not just about the actual locomotion but also the emotion, feeling, and art. How would you communicate a sad or happy walk?
If you need motivation remember this: almost every character in an animated project walks. It’d be smart to master such a basic skill as soon as possible.
Animating a Cat
Animation takes time. So it’s no surprise that this tutorial runs for four hours.
A professional from major studious roughly produces 10-15 second of animation per week. This shouldn’t intimidate you but rather help you to manage expectations.
And this starts with taking the time to learn animation right. As such, don’t skip parts of this tutorial because it might not interest you. This is one of the better tutorials to study and practice fundamental animation skills.
Unlike biped animation where you can just stand-up and act it out, you can’t readily do that with a quadruped. Your main weapon here is analyzing reference and putting in the time to practice.
Throwing a Ball
Need more exercises to master your body mechanics? Try animating the motion of throwing a ball.
This locomotion will present some unique artistic challenges such as the anticipation and the settle after throwing. You’ll also encounter technical challenges such as using props and switching IK to FK.
And if you’re gonna practice with this technique be sure to download the rig to follow along.
Using Animation Layers
Animation layers are one of the main features that set 3D apart from 2D animation.
It’s a feature where you can add/modify an additional animation without modifying the base animation.
While you can have one master animation layer, it gets harder to manage complicated actions and frequent revisions.
In this tutorial you’ll discover why this is a must for production work: not only for animators but also for the supervisors.
Thrown the process you’ll learn how to manage these features using a dedicated animation layer editor.
4 Ways to Animate a Camera
Are you about to create a shot layout for your main sequence? Well this tutorial explains several methods on how to animate your camera.
These include using keyframes, motion curves, aims, and camera cuts.
You’ll also learn fundamental shot compositions that will help you frame your shots effectively.
Creating Games Assets
In this extensive 14-part modeling tutorial you’ll create a complete bridge ready to be exported for a final game.
You’ll create every detail from scratch such as the rope, planks, and screws. This is a massive guide for anyone serious about game development.
You’ll start off by blocking your scene, UV mapping your objects, and then conclude with look development for your assets.
Game Ready Barrel Asset
Building a medieval set-up? You can start with this tutorial where it teaches you to make a barrel asset for games or animations.
While the asset may not look much, this video will teach you the necessary workflow to create any game asset.
This includes skills like retopology of high poly assets and baking normal maps. You’ll also learn how to create other maps such as diffuse and roughness in Photoshop.
Full 3D Asset Workflow
If you’ve already gone through a few tutorials you should know your way around Maya.
However, real production needs to use different software alongside Maya.
So in this tutorial the author uses a nondescript asset to walk you through the asset creation phase from modeling to texturing. You’ll be using Maya, Zbrush, and Substance Painter.
It’s a complicated process but by learning this 3D workflow you’ll become a valuable asset to any creative team.
45 Maya Tips in 45 Minutes
In this demonstration you’ll learn some very handy tips and tricks ranging from simple to complex on how to speed up your Maya workflow.
Topics covered include animation, dynamics, effects, among many others.
You’ll also learn how to use the camera clip plane, polygon reduction tool, dynamic playback, and even handy workflows for turning off your textures when saving your files.
You’ll also get hands-on with Maya’s advance feature toolset such as Bifrost and Xgen.
Premium Courses
CG Spectrum 3D Modeling Course
All the tutorials in this list are self-paced and on demand – except this one.
Instead of watching pre-recorded tutorials you can instead learn in an online classroom set-up. The extensive syllabus with CG Spectrum starts from the modeling foundations and then to character and environment modeling.
Every teacher is also a working industry professional. This way you know you’ll be learning relevant techniques that apply to any modern 3D art career.
It’s also a good way to start building your network by connecting with other students.
By the time you finish this class you will have a decent portfolio ready for hire. This is a pricier option but it has to be one of the more complete ways to learn Maya from the ground-up.
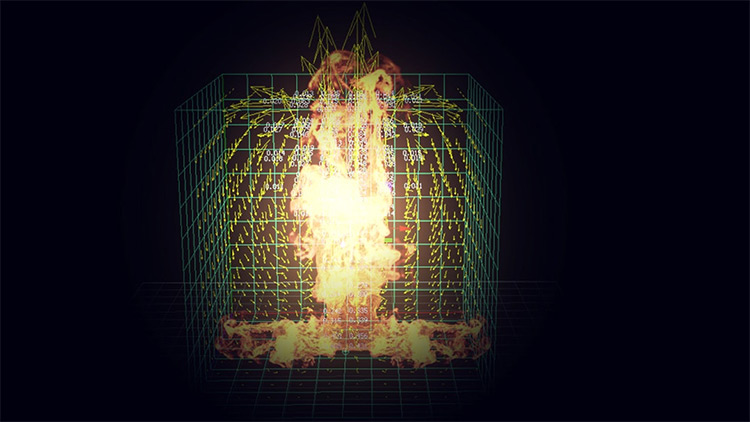
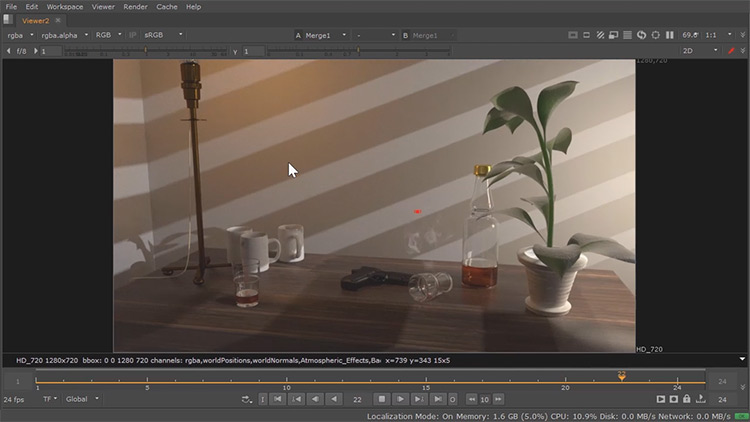
Maya Fluid Fundamentals
If you intend to add production value to your project then you’ll eventually be using visual effects.
This is what gives your production the “wow” factor. Maya comes prepared to execute all your visual effects shots.
It’s also worth clarifying that fluids do not only pertain to water. They also apply to smoke, explosions, and clouds.
Maya comes with two main fluids solver: Maya Fluids and Bifrost.
In this premium course you’ll be tackling the former. Needless to say, you can still apply the concepts to the latter.
With Maya Fluids you’ll be working with voxels, the 3D equivalent of pixels. You’ll learn how to create fluid containers and fluid emitters.
You’ll modify essential fluid parameters such as density, velocity, and temperature. You’ll also troubleshoot the common conflicts encountered in the simulation such as collision and simulation quality.
Then you conclude the project by rendering it with Arnold inside Maya. By the end of the tutorial you should be incredibly confident in making fire and smoke, or working with any kind of fluids in Maya.
nParticle Fundamentals
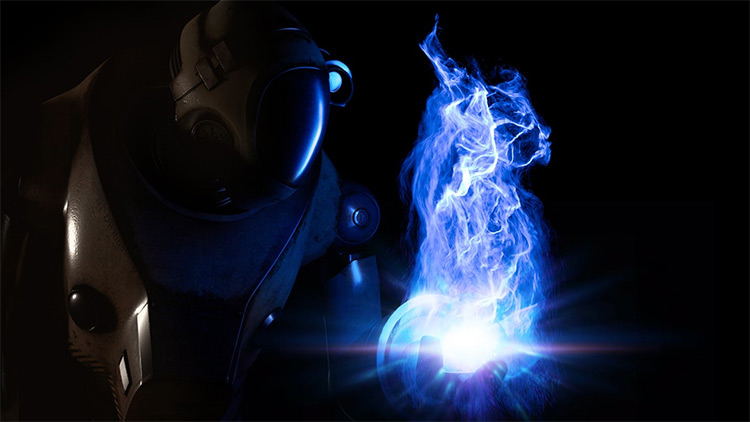
Another staple of the visual effects workflow is particles.
It’s not surprising that Maya comes with a robust particle system under the nParticle toolset.
It’s also easy to use and multi-threaded.
With this course you’ll learn the essentials of nParticles such the emitters, colliders, and nucleus solvers, among other tools. With the nucleus solver nParticle can interact with nCloth which is incredibly valuable.
As a case study you’ll simulate energy effects from the initial energy generation to its release.
You’ll use many different kinds of emitters and control them using force fields. Lastly you’ll learn different rendering workflows applicable to particles using the Arnold renderer.
Shading and Texturing Fundamentals
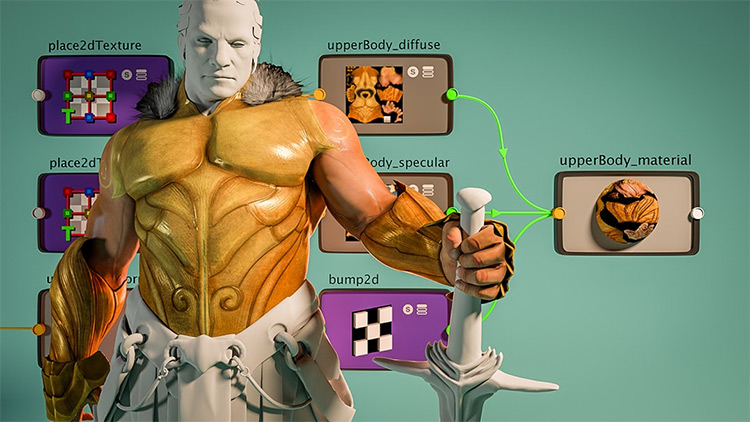
Most assets nowadays are textured in a dedicated material authoring software such as Substance Painter, Mari, or Quixel.
However this does not mean that texturing inside Maya is obsolete.
It’s actually quite the contrary as you’ll still be modifying the maps within Maya for further processing. In addition, Maya comes with handy features that can generate procedural maps.
In this tutorial you’ll dive deep into Maya’s texturing backbone: Hypershade editor.
This window allows you to create and modify shading networks to create simple and complex materials.
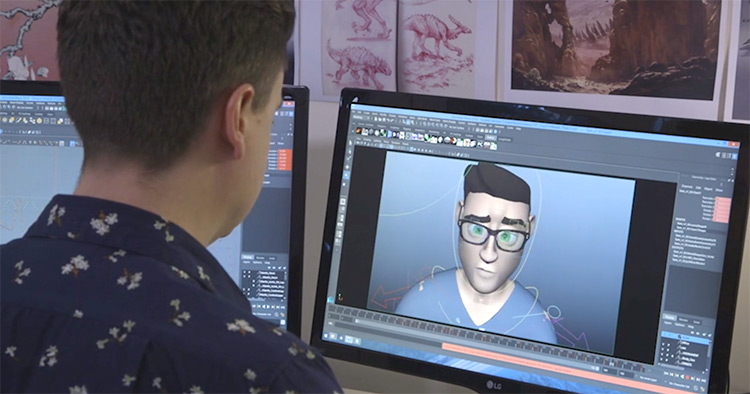
Facial Rigging Fundamentals
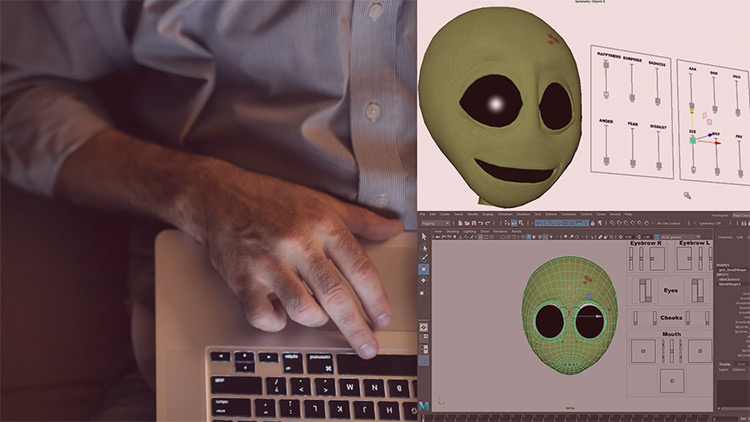
Due to its complexity, facial rigging is tackled almost independently from body rigging.
It requires a delicate balance of being technical and artistic.
There are two main ways to rig the face: by joints or by blend shapes.
In this tutorial you’ll be using both to achieve an appealing final product. This includes creating strategic controls that allow posing the face into several expressions.
You’ll also learn handy rigging techniques such as setting up fleshy eyelids and aim constraints for the eyes. If you’re aiming to be a technical artist, facial rigging is an essential skill to master.
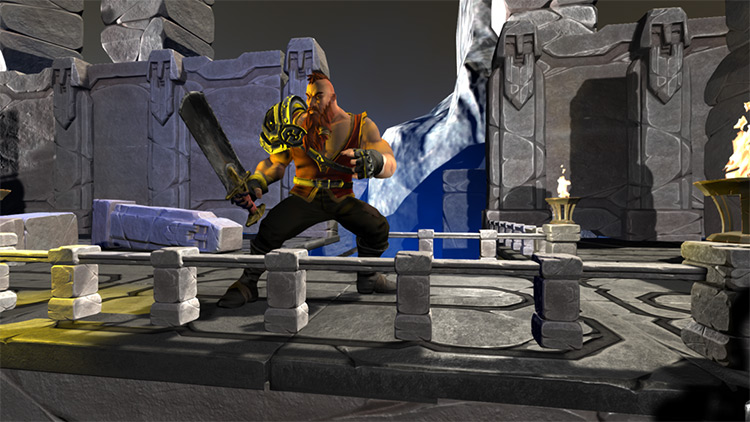
Creating a Stylized Set Element for Games
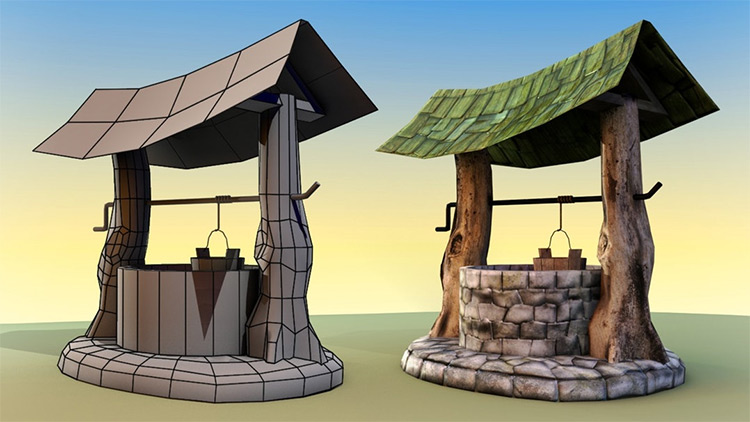
Modeling concepts are applicable to every asset you want to make.
However, having a niche style will also help you stand out.
In this tutorial you learn to create stylized assets that can be used as your set pieces. By the end you should understand what makes an asset “stylized”.
The instructor will be taking you through from modeling to UV layout work using Maya.
Photoshop will then be used for further texture adjustment. You’ll end with the Marmoset Toolbag to quickly visualize your assets.
Retopologizing Game Characters
To be upfront, retopology is probably the least interesting part of the 3D creation process.
It’s not artistic or technical enough to build a career out of. But it must be done.
Retopology comes after the highly detailed sculpt but before rigging or texturing.
As a junior artist you might get this task often.
That’s why a tutorial like this will help you learn how to optimize your mesh and the standards of topology. You’ll be using Maya’s Quad Draw Tool for most of the process.
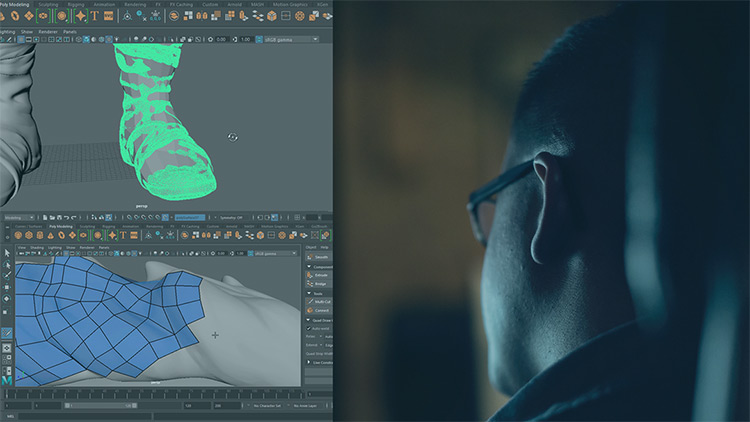
UV Mapping Game Characters
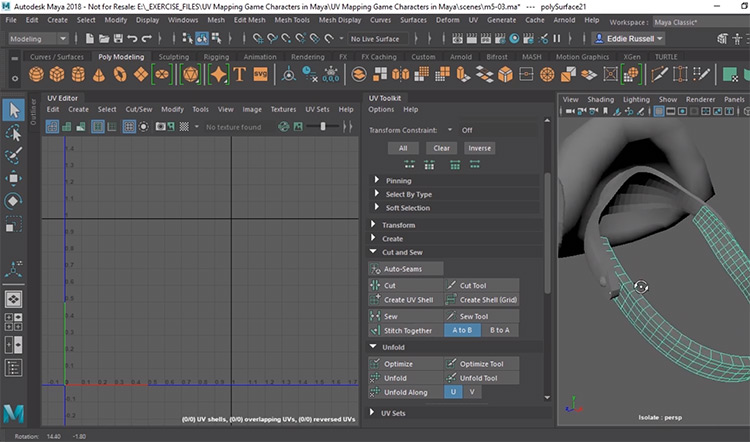
Like retopology for modeling, UV mapping suffers the same conundrum for texturing. It’s not artistic or technical enough to build a focus around but it must be done.
Before a character gets textured it must be UV mapped properly otherwise you end up with inconsistent details. With the addition of a new UV algorithm, Maya makes it easier to create and modify UV layouts.
Throughout this course you’ll learn to create UVs for the body, hair, and many accessories.
You’ll also learn the idea behind overlapping UVs and texel density. Lastly you’ll prepare your character for a multi-material workflow with Unity.
Game Character Animation in Unity and Maya
Maya handles the game pipeline just as well as it handles the film production pipeline.
The main concern with using different software is file compatibility. Maya comes with a dedicated game exporter built for that purpose.
This will shorten the trip between applications and increase your time spent working.
So here you will create several game animation cycles such as walking, running and jumping all in Maya. You will learn how to use animation clips from scratch.
Then later you’ll export all of this into Unity to test your animation’s interactivity.
Maya does come with a hefty price tag for indie developers that can easily break the bank. If that’s the case you might want to check out the Maya LT version.
Creating Game Environments in Unity & Maya
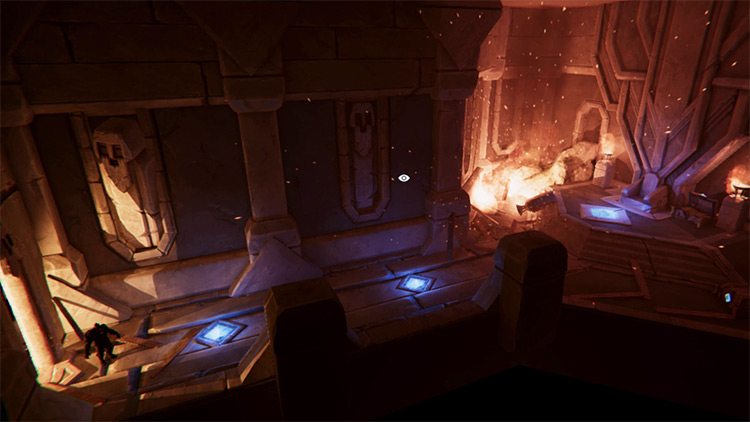
For this very detailed tutorial you create an environment for Unity using Maya.
Game assets, whether they be characters, props or environments, have always been tricky.
You want to make it as artistic or realistic as possible but are limited by the game’s polygon size restrictions.
With this tutorial you’re able to juggle such a compromise.
You also learn an efficient and effective workflow by reusing models and tiling textures.
You’ll also realize that creating environments requires a different mindset than creating a single prop or character. You’ll always need to look at the bigger picture with environment work.
Finally at the end you get to import your work inside the Unity game engine.
Fundamentals of Arnold for Maya
In this comprehensive tutorial you learn how to use the Arnold renderer plug-in inside Maya.
Arnold renderer has been used by major Hollywood studios and for good reason. It has been a proven production photorealistic render engine.
What makes it more exciting is that Maya ships with Arnold. This means you don’t need to purchase additional licenses unlike with other renderers.
Some topics covered include the theory of ray trace rendering, sampling, materials, and lighting.
Even workflow tips such as the use of stand-ins and shadow catchers are covered. You’ll also be introduced to linear workflows, which play a key role in using 16 to 32-bit map textures.
With Solid Angle’s roadmap of GPU implementation Arnold is poised to dominate the rendering war. It’s a technology worth learning.
Multi-pass Rendering with V-Ray & Maya
Multi-pass rendering is mainly used for off-line rendering and not necessarily for real-time rendering (i.e. games).
So render passes are a must in every post-production workflow. With other renderers, they are commonly referred to as arbitrary output variables (AOV).
In this tutorial you learn how to use such passes with Maya and V-ray renderer.
You’ll learn how easy it is to generate diffuse, lighting, and motion vectors passes, among others using V-ray.
You’ll also discover how passes can save a team when dealing with minor revision notes. Instead of re-rendering the whole sequence which can take hours, you just perform a few tweaks to your passes inside compositing software in a matter of seconds.
You can even reposition the depth of field to adjust your focus. The techniques presented will surely help you meet and surpass deadlines.
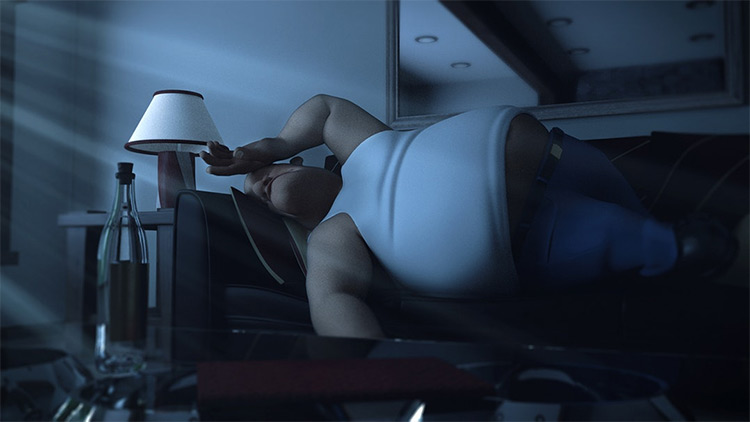
ZModeler Character Workflows in ZBrush & Maya
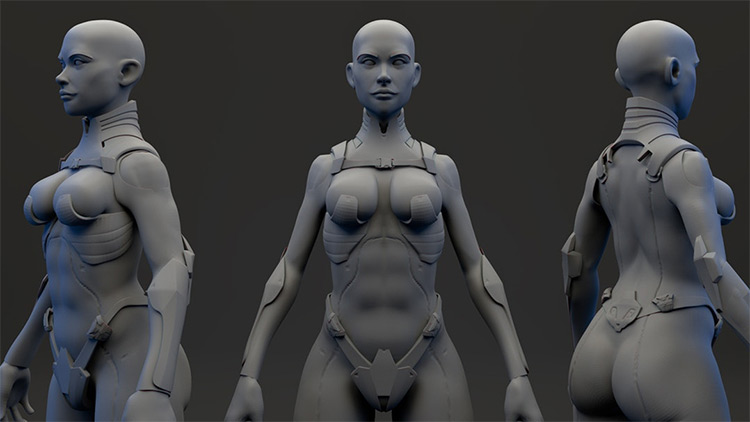
In this cross-software tutorial you’ll learn how to create a character from concept to completion.
Technically you can create a character solely inside Maya. But more often than not bigger productions demand the use of specialty software such as ZBrush. This tutorial will get you up-to-speed to help meet such demands.
Throughout the process you’ll create the main asset including props and accessories in ZBrush using the Zmodeler brush.
This brush was created to accommodate a polygon workflow inside the software. The Zmodeler is commonly used for low to mid blocking.
Afterwards you can start sculpting using the typical 3D workflow.
You’ll also learn how to use reference photos to add authenticity to your 3D artwork and several workflows such as material separation.
At the end of this course you’ll export to Maya for UV unwrapping and finally render your work with Arnold.
Author: Ben Traje
Ben is a stylized character rigger based in Davao City, Philippines. Proficient in Maxon, Cinema4D, and Autodesk Maya, he's available for remote freelance work with plenty of samples in his portfolio.


")


