

12 Best Photoshop Plugins for Artists & Animators
Photoshop is a powerful program with many tools and functions. But sometimes that functionality falls flat.
It’s easy to waste hours struggling to find the perfect color palette and organizing your layers into the perfect structures. And don’t even get me started on how long it takes to sift through brush collections.
Luckily some creative minds have built PS plugins to solve every problem you could imagine.
Even if you only use one of these plugins it can still help to streamline your artistic process. Saving time on menial tasks means you can focus more on what really counts—your artwork.
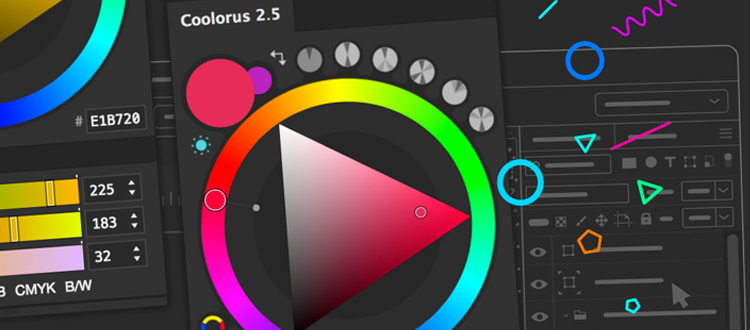
1. Coolorus
Coolorus is the color wheel plugin of your dreams.
The plugin boosts your speed and consistency when choosing colors and even saves your color-picking history on the fly. The UI is simple to understand and exceptionally responsive to fast color picking.
If you struggle with color consistency and harmony use Gamut lock and the Color Mixer features to keep your artwork on track.
They lock the range of colors you can choose from, keeping your palette consistent.
Mix your colors to create new shades with the Color Mixer and collaborate with others by saving and sharing your project’s palette.
Deceptively simple, this plugin has a minor learning curve and will get you choosing better colors instantly. The sleek UI is a major selling point and Coolorus’s functionality will support you in choosing the best colors for your artwork.
2. BrushBox
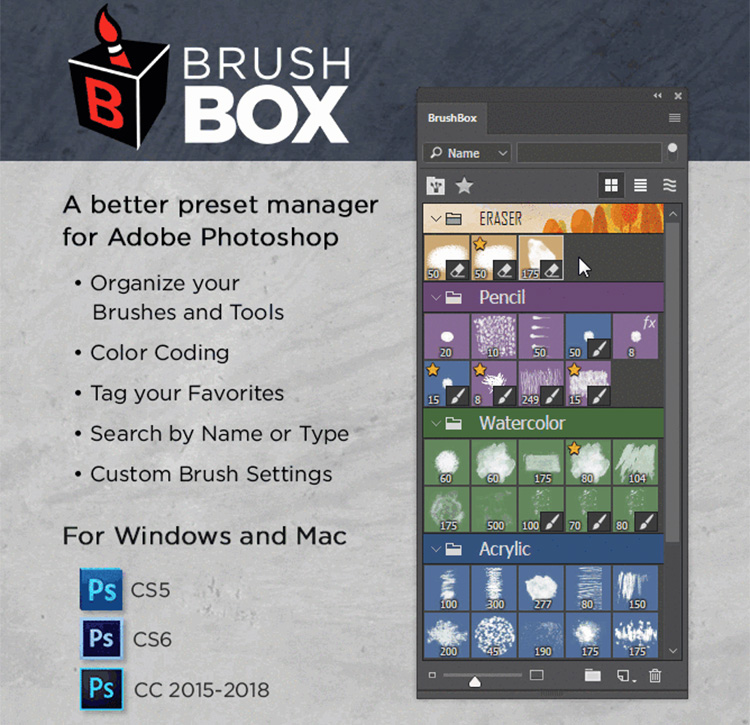
Have you ever download a bunch of beautiful new brushes only to spend the next two hours trying to find the right one?
It’s no secret that Photoshop’s Brush Preset Manager is lacking in organizational capabilities. And it’s easy to waste precious time sifting through your brush collection for an old favorite.
That’s where BrushBox comes to the rescue! It has the brush management power that you’ve been searching for.
You can organize your brushes into labeled groups that are color coded for easy identification.
Custom tag your favorite brushes so you can find them later with a quick search. If you find yourself using one brush in the same way over and over again, you can change its preset settings too and even predefine its color.
Quick, light on resources, and super easy to use, BrushBox is perfect if you are looking for a little more simplicity in your digital painting.
3. Renamy
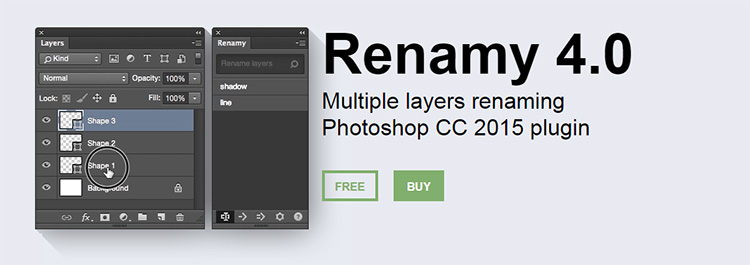
If you often wind up with complicated, messy projects, Renamy is the perfect plugin for you.
It’s a layer organization tool with an impressive renaming and tagging system.
Renamy’s flagship feature is the selection and renaming of multiple layers in a single click. After the rename is complete it records the name you used as a tag, making it easy to find those layers at a later time.
Exceptionally useful in large projects with over 20 layers, the Find and Replace function can quickly rename in batches.
For example you can tell Renamy to find all the ‘red’ names and replace them with ‘blue’.
Renamy requires you to use a little bit of basic coding with their own language but it is quick to pick up and easy to remember.
Take a look at their FAQ page to learn about the commands they use and keep it saved as a cheat sheet!
4. MagicPicker

MagicPicker is similar to the Coolorus plugin(#1 on this list) and serves as an improvement for your color wheel.
It’s beyond simple to use and comes with some added functionality and smart keyboard shortcuts.
The color wheel can be displayed in a LUT cube or a traditional color wheel. The UI is smooth and well-optimized, scaling almost instantly when you made the panel bigger.
If you enjoy painting with color schemes then MagicPicker gives you the option to choose locked Mono, Complementary, Triad, and other similar schemes.
To further limit erratic color choices you can enable Gamut Lock, limiting your color options to a warm or cold gamut.
For those who intend on printing their work, K-Lock locks the K value of CMYK projects ensuring printed colors are vivid and accurate.
This plugin can be installed in both Photoshop and Illustrator making it even more versatile than other options.
5. MagicSquire
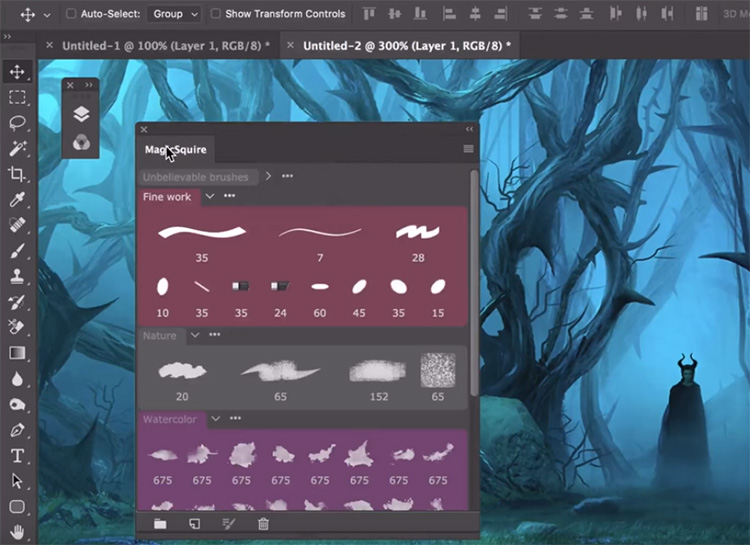
Like BrushBox, MagicSquire allows you to organize your brushes into basic color-coded groups for easy selection.
However the true power of MagicSquire lies in its detailed brush saving and preset settings.
When you save a brush you’ll see four auto-generated previews which you can choose from.
In addition, you can set which features you’d like to save—color, size, jitter, opacity, and more.
For something more unusual you can change the visualization to horizontal mode—a unique way to see how your brush will react when drawing horizontal lines.
The UI is simple and user friendly making it quick to learn.
Just watch the main video tutorial and you’ll be organizing brushes, making brushes, and creating artwork faster than ever before.
6. Color Constructor

The Color Constructor takes the guesswork out of choosing your palette. It taps into powerful 3D visualization tools and instantly gives you a realistic palette to work from depending on your color source.
Simply pick the light source color and the shadow color for the scene you are painting.
Then you can choose up to four base colors and get instant shading results according to your lighting system. Next screenshot the result, copy it to Photoshop, and you’re ready to start painting with an accurate color palette.
The plugin requires no 3D knowledge and is simple to use.
You can repeat the process as many times as you want to create detailed scenes with multiple light sources.
Tap into the power of 3D lighting systems without ever having to open a time-consuming 3D program. If you want more details watch this video to see how well it works in action.
7. Prisma Palette
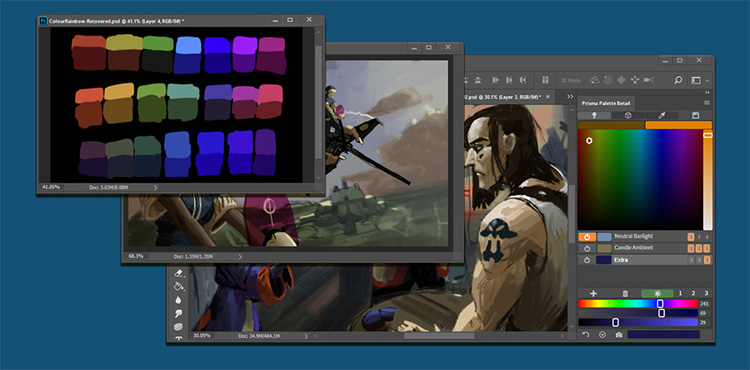
By using the Prisma Palette plugin you can automatically calculate the colors of your scene based on light and shadow.
It does not give you a pre-visualization but instead adjusts the color of your brush according to the lights you have.
Right off the bat you can choose your ambient color and then a light color and begin painting with your base. It works with algorithms so the whole process may feel a little clunky at first, but you’ll get used to it with some experimentation.
The plugin is still in the Beta stage and the creator is busy creating detailed tutorials, but it’s still a worthwhile investment if you want to find out more about color theory.
Watch this brief tutorial to see how it works and why it can help introduce a more realistic color palette to your artwork.
8. The Animator’s Toolbar

Animating in Photoshop is a frustrating and time-consuming task.
A simple project can quickly turn into a confusing mess of layers. PS drawing tools are superb, but the lack of timeline management leaves animators pulling their hair out.
The Animator’s Toolbar speedily organizes the chaos with tools that can move, duplicate, order, label, and merge layers on one timeline.
The most powerful feature of this plugin is its ability to process multiple layers simultaneously while speeding up your workflow.
The Animator’s Toolbar contains a separate toolbar that has many of the features you expect in other 2D animation programs. You can create holds, introduce new video layer groups, and reverse the timing on selected layers.
If you are a serious animator looking to create frame-by-frame animations directly in Photoshop, this is a must-have plugin.
9. AnimDessin2
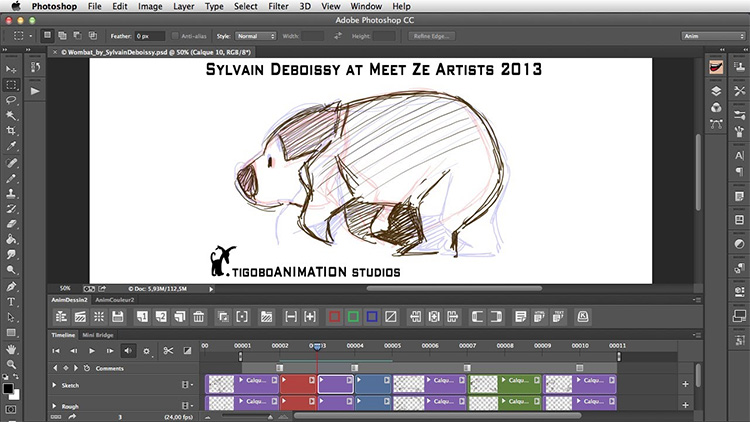
This plugin is completely free and is perfect if you want to explore your animation options within Photoshop.
Like The Animator’s Toolbar plugin, you can use AnimDessin2 to simplify the animation process within Photoshop.
The plugin is a bare-bones operation and sets you up with a timeline panel and the ability to choose the duration of the key frame for each layer.
You can then quickly playback your project to see the results.
AnimDessin2 is great for beginners looking to try their hand at frame-by-frame animation. But it might be too simple for artists used to more functionality.
10. Brutus Symmetry

This fun symmetry plugin comes packed with smooth functionality and intelligent tools.
Although the tools seem simple at first, the ability to quickly mirror/reflect and rotate will soon become part of your everyday design process.
For rapid-fire character designs and brainstorming sessions you just set up horizontal and vertical guides that instantly mirror your brush strokes. You can move the guides as you go, quickly changing the look and feel of your work.
Brutus doesn’t limit you to guides though.
It also works with selection areas. Select what you want to reflect and click on one of the many tool options for instant results.
For some wacky, addictive designs you should play around with the kaleidoscope feature.
This plugin is as fun as it is useful!
11. ParticleShop
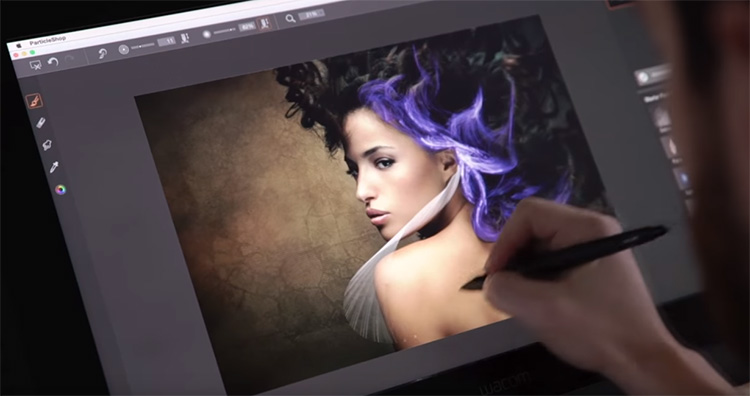
ParticleShop is one of those cool plugins that both beginners and experts will love. It creates realistic particles with your every stroke and breathes life into your images.
The plugin comes with 11 default brushes helping you paint everything from smoke to disintegration effects.
It is the perfect tool for any artist that uses heavy particle effects like superhero power blasts or swirling fiery embers. Many use this plugin to augment photos and turn them into stylized works of art.
If the included brushes don’t meet your needs you can always make your own or download an additional brush pack. The brushes are easy to use and you can find an extensive video library of all brushes right here.
If you want smoke, epic energy blasts, or fairy dust, ParticleShop is the spark you’ve been looking for.
Also note: ParticleShop is compatible with Adobe Photoshop, CorelDRAW, and a variety of similar graphics editing programs.
12. Perspective Tools
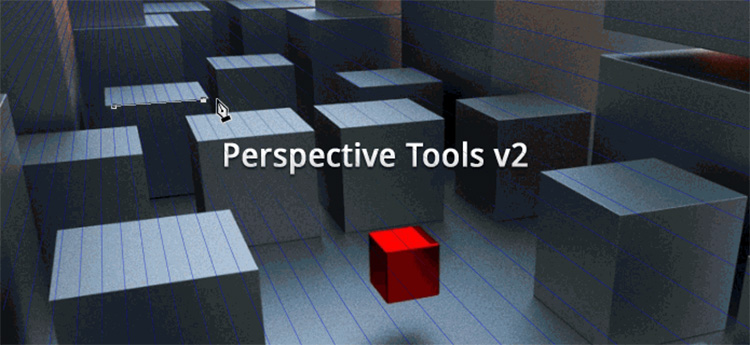
Perspective Tools is a fantastic plugin useful to artists who use basic 3D renders as a base. It’s also great for anyone who does technical matte painting.
Basically it’s used for placing 2D textures in the correct 3D perspective.
By using the pen tool you can create a perspective grid with one, two, or three axes.
On the grid draw a shape—most commonly an open square. Then snap a 2D smart layer to the path points.
The smart layer remains editable and can be changed at any time. This is useful for operations like placing a poster on a wall or a sticker on a box.
One impressive and particularly unique tool in this plugin is called de-perspective.
After you select an area with the pen tool and hit de-perspective, the software tries to calculate what the flat, unwrapped texture would look like. You can then edit the smart layer containing the unwrapped texture and have it automatically update the 3D output. Pretty cool!
This plugin does require a basic understanding of perspective and the principles of 3D. When used correctly it’s a handy tool that speeds up operations that used to require time-consuming warp-mesh edits.
Perspective Tools takes a little getting used to at first. But watching the preview video and reading the documentation will give you a good head start.
Author: Claire Heginbotham
Claire is a traveling creative living in Osaka, Japan. She spends her days writing things, learning things and eating ungodly amounts of sushi. Read about her adventures here or secretly stalk her on Instagram and Twitter.
")


")
")


