

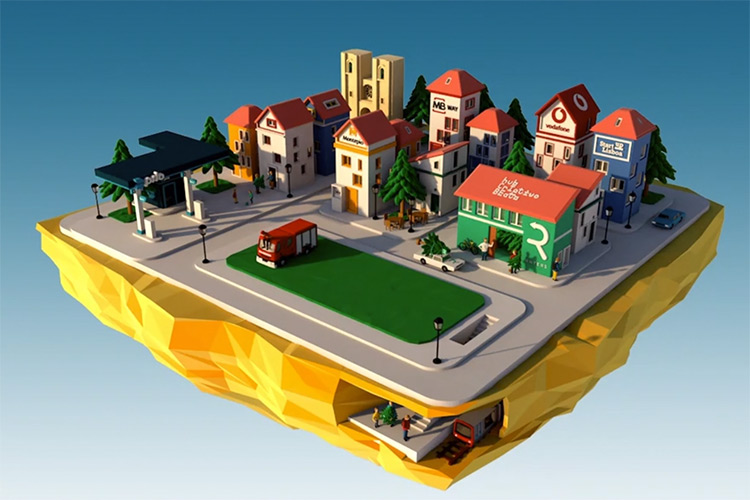
What is Retopology? (A Complete Intro Guide For Beginners)
Retopology is the process of converting high-resolution models into something much smaller that can be used for animation. It can be a difficult process, but the basic idea is to create another mesh that simplifies the original HD asset.
In the past a 3D artist would painstakingly build a mesh polygon-by-polygon. The problem with this approach is that it’s very technical and difficult.
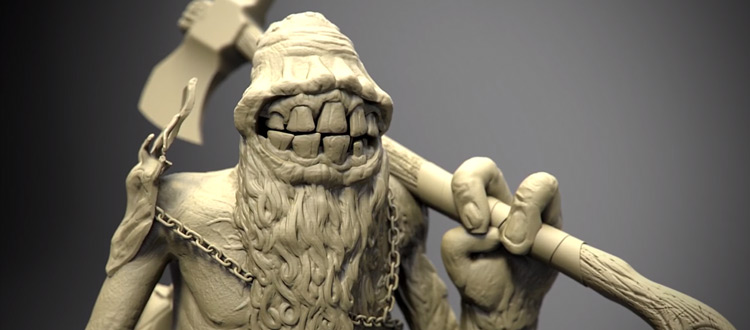
Sculpting is a more intuitive process that lends itself better to how artists think and work.
The downside is that you have to create a lot of polygons to sculpt the curves you need. And too much detail will slow down even the most powerful computer.
That’s where retopology comes in. By overlaying a low-polygon mesh onto a high-polygon mesh you can get something that’s perfect for animating and easy on your processor.
While it sounds intimidating, retopology is an important part of the sculpting workflow.
Why Retopologize
3D artists used to rely on techniques like box-modeling to create their objects.
The surface of a character would be approximated using the simplest forms possible. Later more details could be added, but the original mesh would be preserved for animation.
This is because complex meshes are difficult to animate. It is necessary to limit the polygon count of any 3D model when it’s used for animation.
Today box modeling is considered old-fashioned. It is more common to start with a high-resolution model and work backwards.
Sculpting high-res models is faster and more natural so it’s much easier.
There are tools to auto-retopologize a 3D model so that’s always an option too.
But depending on the tools, and the model, you can expect varying degrees of success. It’s often desirable to retopologize the mesh by hand so the results can be fine-tuned.
The Benefits of Retopology
Retopology allows artists to create organic, high-resolution models from the start using a workflow that’s much more fluid than the old box-modeling technique.
Also if you retopologize your models it becomes easier to add textures to sculpted models. The new retopologized mesh will be free of distortions and other problems that are often present in free-sculpted 3D meshes.
The main use of retopology is to get a polygon mesh at a smaller file size that’s useable for animation. The process of sculpting in tools like ZBrush or Blender results in high resolution models with many unnecessary polygons.
Through retopology we recover a more efficient 3D surface that’s better for painting and animating(either for movies or video games).
It’s also easier to UV unwrap a low-poly model than one with many polygons.
Getting a good UV unwrap is necessary for textures and materials that comprise the surface of the final model.
And the best part: we can use high-polygon models to make textures for the topologized version!
In this way we can preserve the details we get from high-resolution work, but still generate a model that runs smoothly with animation.
In video games it’s common to have several versions of a model. These are interchanged as the player moves closer or further from an object. This is useful because details are only shown when the player is close enough to see them.
This saves on precious computing power which can be used for other things like particle systems or more complex environments.
Retopology is also great for cleaning up 3D scans which can often be messy, incomplete, or need optimization before use.
Other practical reasons to retopologize can included character clothing. Retopology makes it easier to create clothes that cling to the surface of the 3D model and look incredibly natural.
The Workflow
The artistically-driven nature of modern 3D sculpting allows for a fast workflow and stunning results. But the sculpted mesh is often messy and unsuitable for animating(or applying textures).
The topology may be unevenly subdivided or otherwise suboptimal at first.
Many of today’s 3D artists have never learned to use box-modeling techniques. Their solution to complex geometry will often be to increase the resolution of the mesh, creating something wholly unsuited for production work.
Programs like ZBush have tools to get you started, included ZSpheres and ZRemesher. These tools help simplify the geometry of any sculpted mesh.
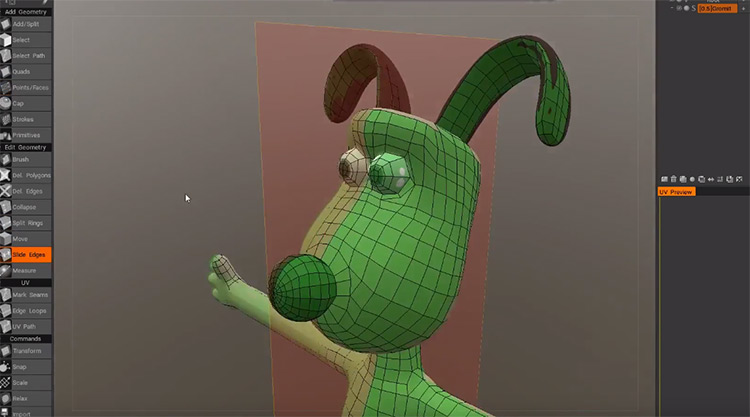
Blender also has some built-in tools as well as available addons that can make the retopology process even easier. Blender artists will specifically want to check out the Polystrips and Contours tools.
Sometimes these tools are enough, but often 3D artists will need to manipulate models by hand.
In this case it’s necessary to approximate the surface features of the high-resolution version point-by-point. The result is a low-polygon model that works beautifully in a game or animated scene.
But for other programs let’s dive in and see what kind of tools we have.
Retopolgy in Maya
Maya offers a few tools to streamline the process of creating a new, simplified topology, allowing artists to focus on the creative process.
The Quad Draw tool lets you fly over the surface of the model creating a new topology in real-time.
With this feature an artist can quickly move around the object and build a new model following the surface of the reference.
Some artists prefer Maya for retopology specifically. After they’ve sculpted art in ZBrush or Mudbox they’ll retopologize the in Maya due to its power and ubiquitous nature in the 3D world.
Retopology in Blender
While Blender doesn’t offer any dedicated tools for Retopology, there are some native features and several add-ons that will make the process easier.
The most useful choices are Contours and Polystrips which make up the RetopoFlow package.
With RetopoFlow installed, new geometry can be created by clicking and dragging along the surface of a reference model.
If you love to sculpt in Blender then you’ll want to eventually familiarize yourself with the retopology process. Otherwise your models won’t be suitable for animations.
Without the RetopoFlow add-on Blender artists will be forced to work polygon-by-polygon which is a huge pain.
Blender has some built-in features to make the process a little easier—like surface snapping and the shrink-wrap modifier.
But in the end, point-for-point modelling will be necessary to get quality results.
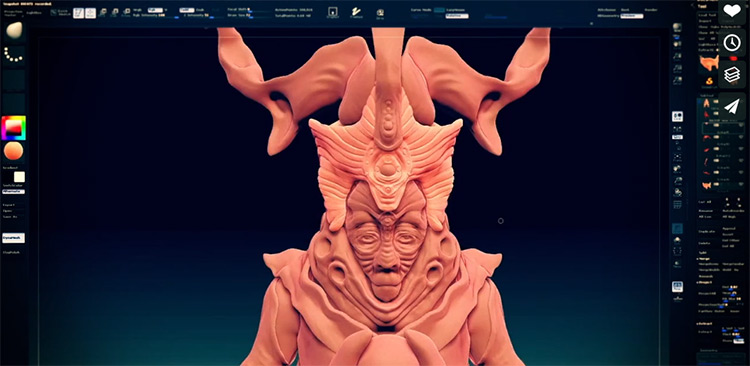
Retopology in ZBrush
It’s no surprise that the world’s leading 3D sculpting tool would have dedicated retopology tools.
ZBrush users with have both ZRemesher and ZSphere to choose from and they’re both worth learning.
ZRemesher will automatically generate a new topology based on a reference model. While not always perfect, the tool can quickly convert high-poly meshes into low-poly ones without losing much detail.
With ZSpheres, ZBrush artists can create new topology and shrink wrap it to the existing model. This allows for quick adjustments to the edge flow and will reduce the polygon count of your model.
Many of these features are covered in detail online so if you’re curious to learn more about Zbrush retopologizing then have a peek at our best ZBrush tuts list and go from there.
Author: Josh Petty
Josh is an artist and game developer who specializes in sci-fi, fantasy, and abstract art. His work employs vibrant colors and combines elements of glitch art, outrun, retro-gamming, neo-geo, and conceptual art. He trained as an oil painter before picking up 3D modeling, animation, and programming. He now runs Brain Jar, a small game development studio that focuses on experimental, narrative-driven content. You can learn more on the website or on Twitter @brainjargames.


")
")


