


Review: Vitruvian Studio Drawing Basics Online Course
Virtuvian Fine Art Studio is a Chicagoland indie art school that operates both in real life and online. For the latter, they offer five programs designed to cover all aspects of realist drawing from basic rendering to advanced facial anatomy.
This review of Drawing Basics follows their drawing 101 course that starts at the very beginning.
Check Out The Drawing Basics Course
“Does this mean they’ll teach me how to attach a piece of paper to a drawing board,” you ask? Yes.
“How to hold a pencil?” Oh yeah.
“Draw a single line?” Absolutely.
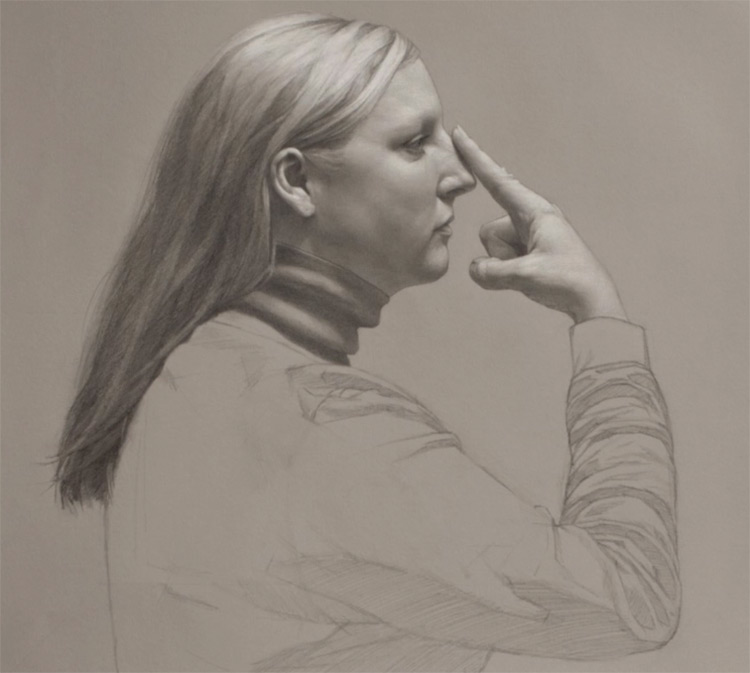
The course is taught by co-founder David Jamieson, a New York Academy of Art MFA and former professor whose work has shown up in a litany of art mags and Prince Charles’s private collection.
This course is best described as “definitive.”
“We assume no prior knowledge in drawing.”
It provides 22 hours of content over 60 videos, each of which comes with an included article. Some of them quite long.
This might be about the simplest aspects of drawing but Jamieson covers them in astounding detail, down to the best light temperatures for your workspace.
His approach might test your patience at times, but that’s the point. And you’ll see it’s invaluable: the amount of information in this course is massive and it’s info that you’d otherwise have to get piecemeal together from dozens of live classes, websites, and videos over years.
I know this because I watched the entire thing. I didn’t have time to cover details on every single module but let’s start this review with a liveblog of the first four modules:
Module 1 – Introduction
The first video already contains one of my favorite quotes about studying art:
“Too frequently, students encounter the sheer difficulty of learning to draw while attempting something inappropriately advanced, and then prematurely decide that they simply can’t draw.”
This advice by itself might be worth the cost.
Next up is an article on drawing tools.
There’s no video attached, but none needed to cover the subject. It goes over the eternal debates of graphite versus charcoal, wood pencils versus lead holders, and what paper types are good for what functions. All this along with providing a full list of recommended supplies for the course.
As other materials go, the course uses a standardized set of worksheets all of which are downloadable and printable.
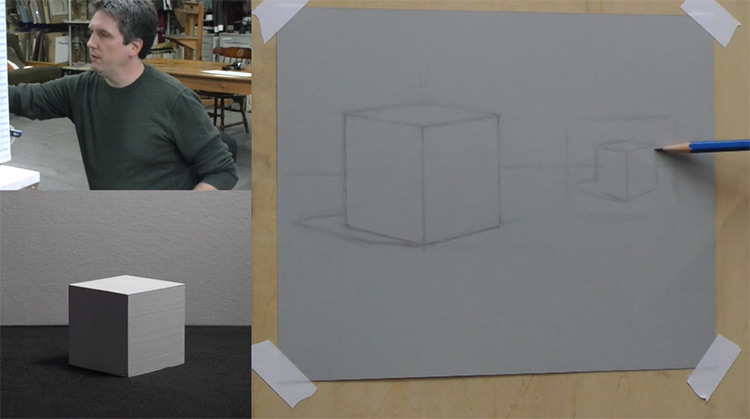
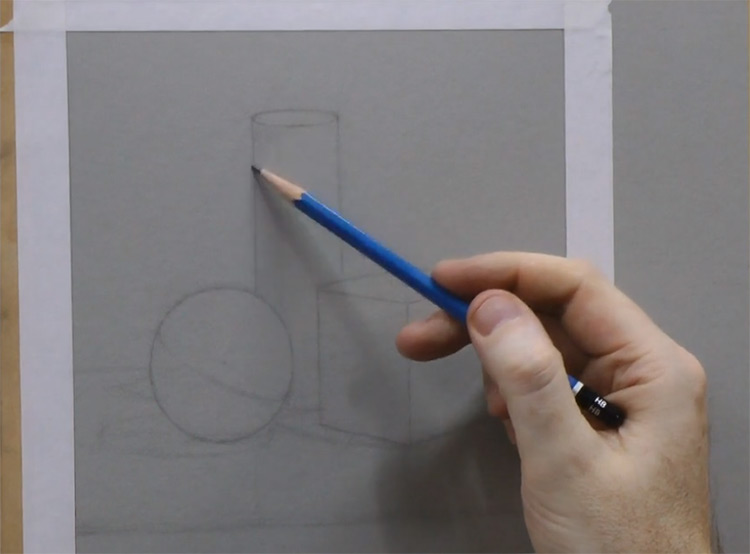
Replicas of the model sphere, cylinder, and cone that Jamieson draws from are also available from their store for $60. But he stresses that you can use any objects in those shapes as long as they’re not distractingly colored or textured.
Module 2 – Line
From here we move onto how to draw a line.
A straight line freehand with confidence, specifically. Something most beginners struggle with.
We’ll need a handle on this technique before anything else because when dealing with straight lines you only have to worry about angle and length, compared to the infinite nuance of curves.
First we go over the most efficient pencil grips for bold and quick strokes. Next is an angle judgment exercise involving printing a page of blank clock faces and drawing diametrical lines across them at various “times,” to get you thinking of angles in numerical terms.
He finally moves onto the frankly brilliant technique of using a connect-the-dots method to draw curves, starting with a series of points, drawing straight lines between them, then drawing the curve around the lines.
In the process he goes into the mechanics of curves in a way that will prove fascinating to any technical drawing nerds, explaining the differences between neutral and uneven (or “trajectory”) curves and finally Béziers—which for the first time I’ve personally seen, he actually explains in a way that makes sense.
Notable tips:
- Lead with your eyes instead of staring at your hands as you draw.
- Gripping your pencil underhanded, towards the back end, facilitates smooth and straight lines.
- Put a lot of practice into drawing angles so that you can draw them accurately from sight or imagination. This will help you out a lot as you practice many subjects.
- Block in your drawing using only straight lines instead of curves. (Blocking in, FYI, is reducing a complex object to the simplest possible shape before drawing the full object in around it.)
Module 3 – Shape
It’s triangle time! This module starts, of course, with the simplest polygon.
This is where I have to mention the first thing I’d consider a flaw: Both drawing modules so far have had whole videos of him doing long and repetitive exercises in full and offering only sporadic commentary in the style of a livestream.
It’s most glaring in this module “On Drawing Triangles” where he devotes an hour and a half to a real-time demonstration of him… well, drawing triangles.
Some of the comments are helpful, so I can’t recommend skipping it. But some of these redundancies could’ve been cut to make the watch time shorter and the overall amount of content less daunting.
The exercise itself—spanning two parallel lines with triangles of different angles and types—is incredibly helpful and crucial to understanding the next section, but I don’t think 20-minute stretches of silent drawing were needed to hammer that home.
Added note: Later on in the course, and again in the website’s About Me, it’s explained that this process is fully intentional to show how long and difficult these exercises are even for the pros.
No matter how long you’ve been drawing, it’s normal to have difficulties and to have to redo stuff. But I chose not to delete that paragraph in order to address a thought you might have yourself while watching it. Just know you’re not alone, and it’s worth pushing through.
From here we move onto irregular polygons, a drawing exercise similar to the last, just with more construction lines and the introduction of triangulation: the process of breaking down complex polygons into triangles to more accurately measure their interior distances and angles.
The final step is curved shapes which combines everything we’ve learned so far.
First you apply all the things learned about polygon drawing, then plot the curves around them using the methods outlined in module 2.
Notable tips:
- Work from general to specific, big shapes to small shapes. (You’ve probably heard this one)
- “Knocking back” is the practice of lightly brushing a large eraser over construction lines in order to lighten them before the final drawing.
- “Lining in” is what follows: drawing a single, crisp final line over your rough construction lines.
- Continually do this as you draw to avoid confusion as to where the actual line is supposed to be.
- When drawing complex shapes(like a piece of fruit or the human head) from sight, start by identifying the outermost points of the shape and drawing a polygon around them. And then go in and start working on the curves.
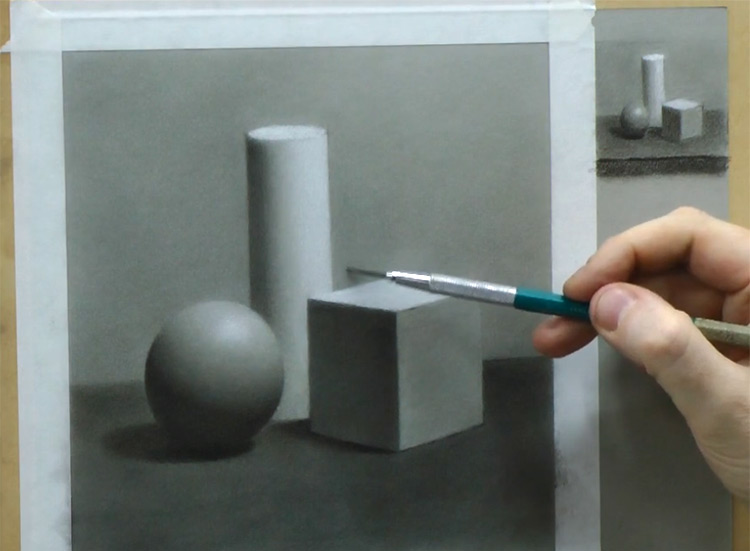
Module 4 – Value
In this section we move to light and shadow, marking the beginning of what Jamieson calls the second stage of the course.
I have to stop here to commend him on what is now my favorite analogy for tones:
“Value for artists is like pitch for musicians,” he says. “Different values in our drawing are like keys on a keyboard or strings on a guitar. Each one must be precisely calibrated relative to the others in the image, or our visual music will be out of tune.”
As for contrasting values within the same drawing: “Different notes can be played together in chords, and will each have a unique sound.” He continues this metaphor throughout the module, using it as a foundation for explaining several other concepts related to value range.
This goes on for a bit until the next section on an almost universally overlooked subject of value compression—condensing the infinite range of values we see in real life into the relative few that come as grades in chalk and graphite… Or as he calls them, “literally dirt on paper.”
Diving deeper, he goes into the even more esoteric field of value notation by introducing the Munsell system—the hue-value-saturation system you might recognize from color pickers in any image editing software.
Using this he’s showing what portion of the total value scale each traditional medium can cover. Turns out it’s not as much as you’d think. Especially for graphite.
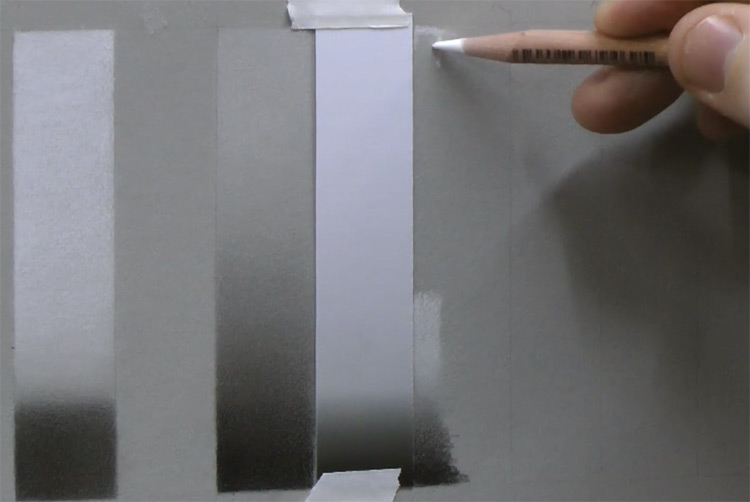
This is followed by a dive into the physical properties of each medium and different paper textures, an overview of tortillons and blending brushes, then an hour-long exercise in drawing value charts.
Finally this module concludes on the crucial note of contrast and value relationships within a drawing.
All value is relative, he concludes, and the intervals between values are more crucial to capturing likeness than the absolute values. “There’s no such thing as light or dark. There is only lighter than or darker than.”
Notable tips:
- On a scale of 0(absolute black) to 10(absolute white), normal graphite is at darkest a 3.
- On a molecular level charcoal and graphite do not mix, making a smooth transition between them in a drawing harder. For the darkest blacks, he suggests using a pigmented graphite pencil like the Kimberly 9XXB, which can reach roughly a 2.
- Try drawing on medium gray paper using chalk pencils for the highlights.
- “Listen to your pencils.” Each grade is designed to produce a certain value at medium pressure. If you can’t get the value you want, change the pencil instead of the pressure. If you find yourself grinding it into the page to get a darker value, or barely brushing the surface to get a lighter one, you’re using the wrong grade.
- Unfortunately grades aren’t standardized between manufacturers so you’ll just have to learn what each one means for each pencil set.
- Don’t try to create dark values in one stroke. Instead, make multiple passes.
- Keep your pencils as sharp as possible for maximum control. Re-sharpen them up to every ten minutes. (Or if you don’t want to burn through your pencils that fast invest in a lead holder and pointer.)
I’ll keep the detailed play-by-play to four modules to avoid both hammering the point home excessively and giving away all their secrets.
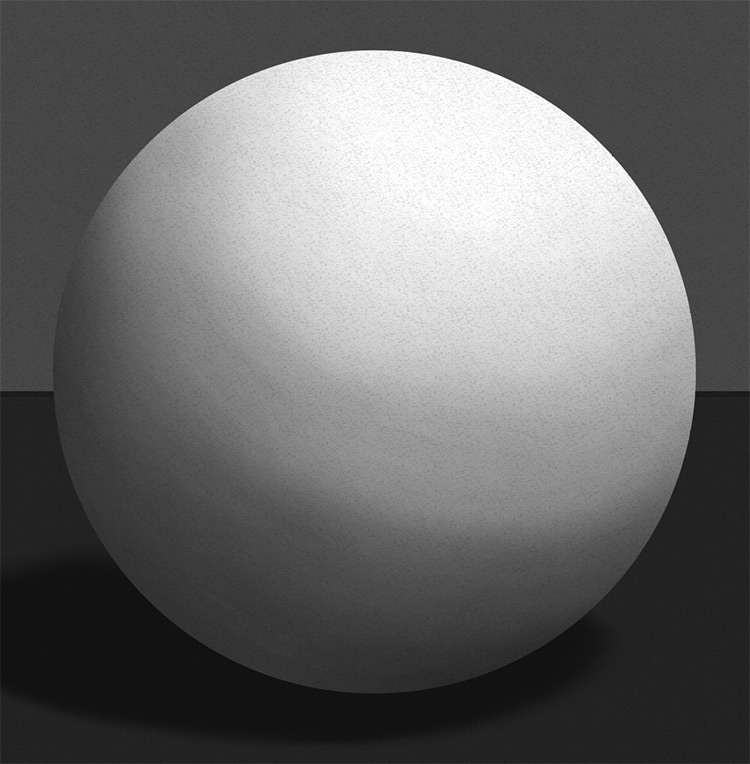
The next five modules are just combining the former knowledge in different ways, such as blending values and rendering the shapes and light properties of all of the major solids.
A Full Course Overview
The massive runtime in this course is daunting when you’re staring it down.
But getting through each video gets easier once you get into the flow.
Going in, I was afraid I wouldn’t be able to finish the entire thing. But once I got past the first couple modules I found myself interested enough to even stop to do some of the exercises.
Due to time limitations I wasn’t able to do all of them, and I rushed through them on a tablet…
…But even in that truncated form the techniques I picked up from them taught me a lot.
At some point I’d like to return to this with unlimited time and a full set of pencils to do them all on paper.
I learned more than I thought would be possible to know about the physical properties of graphite, too.
Did you know the shine it takes on when you layer it on too thick is called burnishing?
I didn’t, and I’m a religious watcher of art tutorials. I should have learned it much earlier.
This course not only defines it, it goes into detail on how to avoid it where so many just accept it as an inherent property of graphite.
And as someone who prefers dark lines that scan well I’d never seen the appeal of any pencil harder than an H grade.
However Jamieson makes such frequent and expert use of the 4-7H pencils and lays out exactly how important they are for smooth transitions, that I might have to buy some.
Technical Aspects
All videos are hosted on Vimeo which AV geeks will know is encoded at a higher bitrate than other hosts to provide sharper images at lower resolutions. And it has the very useful side effect of letting you watch them at up to 2x speed.
The tutorials proceed at a leisurely pace so it’s still perfectly intelligible at that speed, in case you need a refresher or are not able to draw along with a particular section but would still like an overview of it.
Most videos are in 720p with the option to downgrade to 360p.
Now 1080p is available but only for select videos. People with 4k monitors might find this limiting, but the quality of the videos themselves makes up for any technical shortcomings.
They’re perfectly filmed—sharp and clear enough to capture even faint 4H pencil lines. Also fully in-focus and color-neutral to avoid giving you any wrong impressions about each drawing’s value.
Sound quality is… fine. It was recorded in a drawing studio, not a sound studio, and quiet stretches are interrupted by traffic and occasional construction noise. But it’s nothing that should disturb the average watcher too much.
You won’t get TV-quality audio but that’s also not what you’re here for.
Regarding the articles: some are one-paragraph side notes, some are transcriptions of the video, some are totally unique content, and a few modules are an article by themselves.
But one thing that truly separates this course from other professional drawing tutorials is that there’s an active comment section and Jamieson personally responds to every question.
Well, there are no date stamps to tell how old they are if he’s still keeping up with them, but there’s still gold down there in those comments.
A lot of those itching questions everyone has about drawing but are rarely sufficiently answered, I found addressed in the comments. (Q: How much of your hand should make contact with the paper? A: Ideally, the back of your pinky and ring, but not the rest of it.)

In Short…
“Ultimately, you could think of patience as being the goal of this entire course. If you come away … with the patience required to develop things slowly, to give them their due consideration and time, that alone is a huge asset”
—David Jamieson Module 5.4
Anyone can learn to draw on their own. This is true.
But self-taught artists often miss the specific lessons and advice that are part of structured art courses but aren’t easily found in a ten-minute YouTube tutorial.
Courses like this redress that problem. I’d heard of all these techniques and exercises before, but it had never occurred that you should take this much time and effort to do them. And there are countless details Jamieson provided that had never even crossed my radar.
If you’re self-motivated enough to see them through to the end, these exercises can be the perfect middle ground for someone who wants a structured approach to beginning their art career but doesn’t have an atelier in your town.
Not to mention you can rewind as many times as you need.
You might balk at the $200 price tag, but any studio art course will cost more than that and probably offer much less than 22 hours of drawing time.
Personally I wouldn’t use this as my only drawing education. If you have the money and are passionate enough about learning to use it then this makes an excellent one-time purchase to use as a supplement alongside classes or another course of study like Proko’s figure course.
And no matter how many tips I mentioned here, I’ve barely scratched the surface of the amount of information he drops in these courses.
I don’t have the experience of watching this from a complete novice’s standpoint but I’m confident in saying that this course alone could teach you the building blocks of producing traditional pencil art on a professional level.
You can start on the path to representing any subject with the fundamentals from what you’d learn here. The rest will just be developing your eye and learning the process of actually drawing.
Have a look at the main course page to see what else is covered and learn more about the teaching process.
And in case you ever find yourself with five days to kill in Oak Park, Illinois you might watch their site for in-person workshops.
Author: C.S. Jones
C.S. Jones is a Philadelphia-based freelance writer, illustrator, and occasional photographer. He spends his spare time listening to Spotify and waiting for trains. Someday, he’ll finish that graphic novel. In the meantime, his work is best seen at thecsjones.com or @thecsjones on Instagram.
")


