

Skinning Workflow Tips & Tricks For Autodesk Maya
If you’re getting into 3D character projects then you’ll need to work through skinning at some point.
The process is very technical but practice always makes perfect. That said, some help along the way is always great.
Here are some tips to get you started on the process of skinning, specifically with Maya(although tips can apply to mostly any software). But let’s start with a brief introduction…
What is Skinning?
After modeling your character you need to rig your geometry before you can start the animation phase.
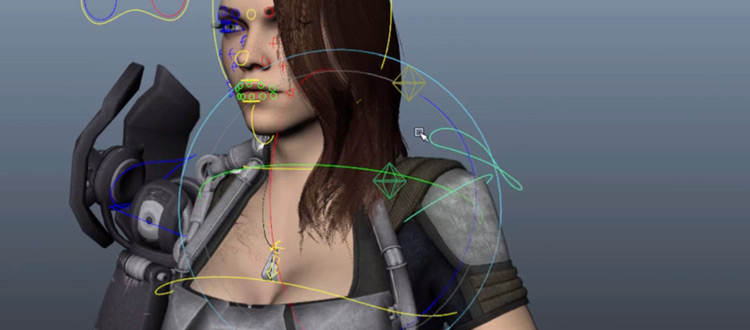
The rigging phase mostly consists of placing joints, skinning, and building controls.
Generally, skinning is the process of attaching your model to the joints, and incidentally, to the controls.
Specifically skinning involves assigning each vertex of a model to one or several joints. In other words, without skinning, you can’t animate your character.
It also serves as the first defense for proper deformation and a deciding factor on how much time to dedicate to other deformation.
Along with the joint placement, skinning has a special place in the pipeline as it can’t be fully automated. Some algorithms can come close but no character rigs have been shipped into production without artist intervention.
This makes skinning an essential skill for any 3D artist.
So with that said, let’s cover some tips and tricks on how to prevent potential issues, speed up your workflow, and troubleshoot skinning problems.
Preliminary Considerations
Like any other pipeline process, skinning is highly dependent on its inputs.
Particularly, the geometry. Be sure to perform mesh cleanup such as removing unnecessary vertices, merging overlapping vertices, observing proper topology, deleting history nodes and maintaining symmetry on symmetrical characters.
Technically you can still skin and eventually animate your character without mesh clean-up.
The problem comes in later when you are trying to fine-tune or correct some weights.
For example, having overlapping two vertices means you have to paint twice. You have the option to paint through view but this also includes painting the other side of the mesh.
Or if you forget to delete history nodes, you’ll soon realize that your rig is playing below real-time frame rate as Maya will calculate existing nodes for every frame.
Another important prerequisite is the joint placement, but this is a Catch-22. You can’t determine what’s a good joint placement if you don’t have the skinning. And you can’t get good skinning if the joint placement is lackluster.
To make matters worse, real-life anatomy joint placement doesn’t translate one to one to rigging.
A classic example is a spine. An anatomical spine forms a somewhat S-shape but if you follow this pattern with a 3D character, you’ll end up with a limited range of motion since a joint will already be biased to another side.
This is why you’ll see the spine joints of character to be almost straight with little to no curves.
The way around this conundrum is trial by fire.
Place joints. Start skinning.
Find out your joints are off.
Delete skinning. Move joints. Start skinning again.
This makes it an iterative process, and I am here to tell you that it’s totally normal.
In time you’ll develop a shorthand memory of what works and what doesn’t. Until then, accommodate mistakes on your schedule.
Now let’s discuss the actual skinning workflows.
Keep Maximum Joint Influence to a Minimum
The maximum joint influence is a known requirement for game character rigs.
However it’s actually a good workflow for every type of production.
In perspective, if you change from 4 to 5 joint influence you are not necessarily increasing the overhead by 25% but probably making it twice as complex as before since it’s will be harder to maintain and debug.
You can set the Maximum Joint Influence under skinCluster Node > Smooth Skin Attributes > Maintain Max Influences.
In most cases you don’t need more than 4 joint influence for a vertex. But if you need more then maybe it’s time to consider having a dedicated blendShape deformer much the same way with facial rigs.
Maintain a Base Weight
No matter how complicated, every character almost always starts or comes with a base mesh. Which is just another term for the naked version of the character.
This naked mesh serves as a good foundation to set-up a base weight as it will probably cover the whole character in proximity.
You’ll reap the benefit of the base weight when you will encounter multiple types of clothing (say a jacket and a shirt).
Instead of starting from scratch, you can pull the weights from the base weight using the Copy Skin Weights Command and just spend most of your time polishing.
Isolate Skinning Commands through Selection
If you execute any skinning commands under the skin menu, by default, it will be applied to the whole mesh.
You can isolate the effect of the command by going to the component mode, selecting the affected vertices and running the command.
There’s no need for additional parameters or vertex/influence maps. It just works.
This comes in handy when you are mirroring weights with a character that has symmetrical and asymmetrical parts.
Use the Stable Import/Export Weights
This is one of the common mistakes we see beginners make.
Maya comes with two options to import and export weights:
(A) Skin Menu > Export/Import Weight Maps, and
(B) Deform Menu > Export/Import Weights.
At first glance it seems like the former would be preferred given it’s under the Skin Menu. The former uses an image map to manipulate the weights which means the quality depends on the resolution of the map.
The latter is a more robust method as it uses exact float values to map weights.
You can also check Brave Rabbit’s Plug-in based on the same algorithm for a streamlined workflow.
With the native command you’d have to identify the joints, reskin the mesh, and hit import weights. With the plug-in just select the mesh and import the weights.
The plug-in will automatically skin the mesh to the existing joints. This is incredibly handy if you don’t have a list of joints stored.
Use the Marking Menu
A typical workflow in painting weights(the key task in skinning) is selecting the geometry, switch to paint skin weights tool, select the corresponding joint in the weight manager, and then begin painting.
The problem comes when you have to deal with more than 20 joints.
Which is often the case for biped characters because the weight manager doesn’t show all the joints. You’d have to keep scrolling until you find the joint.
A better way is to use the marking menu.
In the viewport hover over the joint, hit RMB, a marking menu appears then click Select Influence.
Note that marking menus are different based on the active tool and the object.
So if you don’t see the option, you might not be using the paint skin weights tool or you are not directly hovering over a joint.
Consider Weight Blended
A common limitation in skinning is the way it interpolates deformation.
By default, when you rotate past a given angle the mesh will lose volume, collapse, and wrap itself. To mitigate this Maya introduced the dual quaternion.
However, it presents another problem.
While it works well for rotation-based joints, it also introduces anomalies for both rotation and translation-based joints.
This is where Weight Blended comes in where you specify which parts are linear and which parts are dual quaternion.
You can do this with the Paint Skin Weights Tool and change the Weight Type from Skin Weight to DQ Blend Weight.
Mind your Weights when Smoothing
It’s generally a consensus that Maya needs to improve their smoothing algorithm.
If you are trying to smooth weights between forearm and wrist joints, you’d be surprised to learn that some of these weights are transferred to other joints indiscriminately.
This means when you move your hand, there are chances that the head is moving too.
To prevent this you need to lock all joints and unlock the joints you are currently working on.
It works, but it’s cumbersome since you have to do this routine every time you smooth another set of joints.
Here I’d also recommend using Brave Rabbit’s plugin where it only smooth/assign weights within the range of the brush.
In other words, you don’t need to dance between locking and locking your joints.
Another handy plug-in is the NgSkin Tools where you paint in layers and just blend them for the final skinning. This makes the complicated areas, such as the shoulder region, easy to manage.
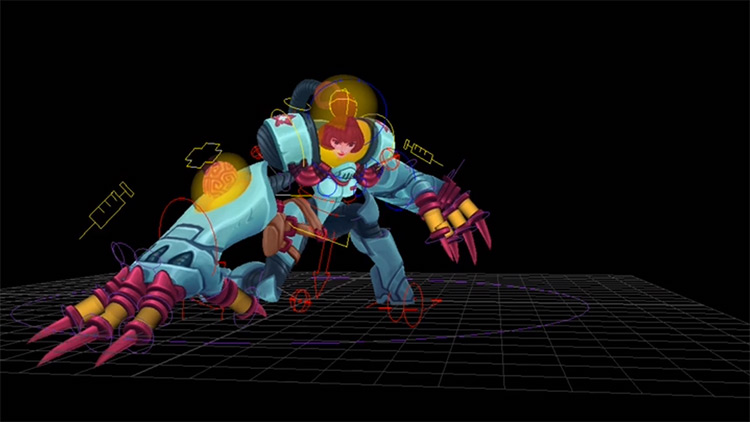
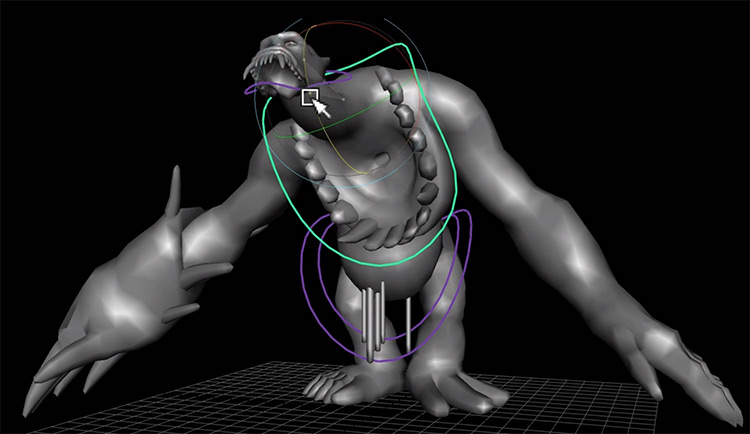
Check the Range of Motion
The true test of your skinning talent is when the character is being animated.
Luckily you don’t need to be an animator to perform this.
You can use a motion capture skeleton and retarget it to your character. Mixamo provides a wide array of motion capture from a simple sitting down to a complicated breakdown dancing.
This is a good way to check your character’s reasonable range of motion, verify its limitation, and eventually reduce the total revision notes that you’ll get from animators.
Conclusion: Know The Limits Of Skinning
While it represents a substantial portion of modern 3D work, skinning is not the only way to achieve deformation.
You’ll most likely use complicated set-ups such as pose-spaced deformation supplemented with correctional sculpts.
Cartoony deformations are also more suited to dedicated deformers such as FFD and squash and stretch deformers.
While this might make skinning restrictive, it’s actually liberating for a technical CG artist.
This means you can focus on what works best for the skin deformer and leave the other deformation to other deformers. In this set-up, it will easier to revise, maintain, and debug.
But keep practicing and find the best workflow that suits your needs.
Author: Ben Traje
Ben is a stylized character rigger based in Davao City, Philippines. Proficient in Maxon, Cinema4D, and Autodesk Maya, he's available for remote freelance work with plenty of samples in his portfolio.

")
")


