

40+ Free Cinema 4D Tutorials For All Skill Levels
Cinema 4D is a comprehensive software package for modeling, animation, VFX, and 3D rendering.
The software found its niche within the motion graphics industry as it offers a robust MoGraph module among many high-level features. Of all its competitors, Cinema 4D is the easiest to learn as it features an intuitive interface and a logical workflow.
In this curated list of free tutorials you’ll learn everything about Cinema 4D with many techniques that can be used for projects in animation, advertising, film, or video games.
Intro to C4D
In this tutorial you get a handshake from Cinema 4D and learn workflows throughout the whole pipeline.
You’ll learn the navigation tools, tips for modeling objects(such as cubes, pyramids, and spheres), and even some technical modeling commands(such as bevel and extrude).
Later you’ll also set-up a scene by adding lights and creating a camera. Finally near the end you’ll learn several render settings for completing your practice work.
The tutorial does not have a case-specific output but it will surely get you up to speed with Cinema 4D fast.
User Interface Basics
As a general consensus, Cinema 4D’s user interface is the most intuitive among other digital creation applications such as Maya or 3ds Max.
Cinema 4D makes it easier for a beginner to get up and running with 3D concepts within a day. As such, you might be tempted to skip this tutorial since it only covers the GUI. But I highly recommend not skipping over this one!
Not because you’d be lost otherwise, but because the tutorial offers several tips and tricks that might not be obvious to a beginner or even an intermediate user.
You’ll walk through different parametric objects that will serve as a building block for many modeling exercises.
This tutorial is also part of a comprehensive intro series for Cinema 4D. Be sure to check out Christoph Doe’s YouTube channel for more videos.
Making a Cup
So this offers a decent starting point on modeling in Cinema 4D.
Aimed for total beginners, here you’ll learn how to manipulate points, edges, and faces to create any desired 3D shape – in this case a cup.
You’ll also learn several modeling tools such as the extrude tool. While the resulting object will not pass for a portfolio, the techniques shown will prove useful in future modeling exercises.
Also take a look at the corresponding project files here.
Realistic Neon Sign
Want to create a cool dark alleyway sign with all the fancy VFX styles? Well you can with this free tutorial.
Neon signs present a unique challenge as the object itself is the light source rather than using a dedicated light source.
You’ll start with a MoText that creates your signage. You’ll then use splines created from the motext to create the lighting tubes using the spline wrap deformer.
The railings will be created from the cloner object which you’ll practice with a lot.
Intro to Mechanical IK Rigging
Rigging is mainly divided into organic and mechanical rigging.
In this tutorial you get to practice the latter. You’ll learn the differences between FK (Forward Kinematics) and IK (Inverse Kinematics). You’ll also understand the importance of object hierarchy for rigging which is essential in Cinema 4D, otherwise you tend to get unexpected results.
Through practice you’ll come to understand what constitutes an IK system such as the IK tag, IK goals, and pole vectors. Apart from the IK tag you’ll also use the up vector constraint tag to control your objects’ orientation.
Rather than hand keying overlapping actions you’ll add a spring constraint tag to save time.
In the clean-up process you’ll zero out the controls by freezing transformations entirely. You’ll also add a protection tag to your objects to prevent unwanted movements.
Create a Low-Poly Environment
Cinema 4D is used in a tight-knit community that more or less defines motion graphic trends.
One of these trends is the design of low-poly objects. With this video you can jump right into low poly design work all in C4D.
You’ll learn how to create the low-poly look not by building fewer polygons, but actually reducing polygons from an HD render which is a far superior workflow for complicated objects.
After the modeling you’ll texture and render your image for delivery.
You’ll also learn several design tips related to shape, light, and color.
After the tutorial you should be able to create a stylized mountain environment with several props such as a boat and a simple docking bay.
A Little House
Made specifically for beginners, this modeling tutorial gives you a deeper look into the workflow of creating a 3D scene.
Most of the shapes are built from a cube object with the help of other primitives such as a cylinder to add minor details(ex: porch light).
You’ll also populate several objects such as trees, a chimney, and a swingset.
Throughout the process you’ll encounter several commands such as using extrude, inner extrude, and connect objects delete to manage your polygons.
You’ll also use several options such as preserving groups and using fillet caps. After you finish with modeling you’ll add materials onto a gradient.
In the rendering phase you get to use the render region feature to accelerate your look development process.
Finally you’ll export an image of the completed house in an isometric view, which is conveniently one of the presets of C4D’s camera object.
And if you wanna check out the end result be sure to download the project files here.
C4D Christmas Tree
These seasonal concepts will surely come in handy in almost any project you work on.
The catch here is you are not necessarily building a Christmas tree solely through modeling. Instead you’re using dynamics systems to create the end result.
The preview looks complicated but this type of short catchy motion graphic piece is where Cinema 4D excels best.
For a smooth workflow the author mentions that, if possible, your objects should be in low resolution as dynamics calculations require heavy processing power.
To build the Christmas tree you’ll use an emitter attached to a helix object. You’ll adjust rigid body settings to control the behavior such as follow position, and you’ll add a floor with a collider tag for a more interactive setting.
You can check the accompanying source files here to follow along.
Pixar-Inspired Modeling
Who doesn’t love Pixar animation? There’s so much to learn from their style and this tutorial is just a small piece of that.
To start: here you’ll get an introduction to Cinema 4D’s sculpting tools in great detail.
Yes, C4D has sculpting tools!
While not as feature-rich compared to dedicated sculpting programs like ZBrush or Mudbox, the C4D tools still go a long way. You’ll explore the grab and push tools among many others.
With this tutorial you can create appealing mouth shapes that can be used for lip-syncing or for stylized characters. There’s so much possibility all from this one Pixar-inspired guide!
You can also check the author’s Dribbble page for his mouth model art.
Cloth Inflation Simulations
Cinema 4D offers three main dynamics system: rigid body, soft body, and cloth.
This tutorial covers a whole lot about the 3rd option.
You’ll start with basic the concepts and challenges of using cloth in C4D. You’ll also learn the key parameter for creating an inflated look, and it’s not as complicated as you might expect.
This leads into exploring case studies with the cloth system such as abstract simulations, inflated text, and creating pillows.
You’ll also be using Cinema 4D’s sculpt tools to adjust your cloth after converting the simulated mesh to a polygon mesh.
Make a Shiny Plastic Material
In this very focused tutorial you’ll practice a bit of look development by creating a shiny plastic material.
You’ll start with modeling a simple bracelet and an interior studio backdrop with the help of subdivision surfaces to smooth objects.
You’ll then create the plastic material and finally set-up your scene for rendering for global illumination.
Slice Loop
Slice Loop is one of those hypnotizing Instagram-style pieces.
The movement is interesting as it is not too detailed but not too abstract either. So with this video tut you learn how to slice meat mainly using the bend deformer to peel the object.
You’ll also learn several tricks such as using the helix primitive object to create a straight line and using a plain effector. You’ll create the corresponding materials yourself and render the scene with the help of some 3rd party tools.
YouTube Subscriber Bell
Here’s a fun little project where you create a YouTube-style bell and animate it procedurally using dynamics.
While Cinema 4D dynamics are not that detailed compared to other 3D software, this is definitely the easiest tool to use. That’s why you’ll see several dynamics for motion graphics pieces.
Here you start by modeling the bell using a spline profile and a lathe object.
The tricky part here is setting up the dynamics right. While the bell looks simple, it presents several problems such as collisions and attaching a rigid body to a collider body object.
With the help of a dynamics visualization feature you’ll troubleshoot your scene by modifying the shape of the collision from automatic to static mesh. You’ll also use a connector object and modify its pivot axis for a stable behavior.
Low Poly Car
We’re back at low poly design work in this fun guide to creating a full car in C4D.
You’ll start again with a box primitive for a base with the help of cylinder and tube primitives for the wheel, and sphere primitives for the headlights.
You’ll also be using the mograph cloner to create the rims.
Throughout the process you’ll use several tools such as the extrude inner and bevel tool. You’ll be using a symmetry object to ensure that your model is perfectly mirrored to fit.
Finally you’ll setup the scene by creating a light and sky object with global illumination. You can check the complete project files and download a copy to follow along.
Animated Text Destruction
Destruction usually comes with a complicated project setup, but with this tutorial a total beginner can easily follow along.
You’ll be destroying an object not by dynamics, but with the PolyFX deformer. To be upfront: it might not look as realistic compared to other solutions but with the right settings you’ll get a pretty decent result.
The interesting thing about the setup is that it’s all procedural.
If you don’t like the initial text you can easily change it at any point with the help of the motext object. It’s also easy to appreciate Cinema 4D’s real-time response as you modify different settings. And you’ll be using the time effector and modifying its fall off which is great practice for all animation/motion graphics projects.
Another possible usage for this effect is in a disintegration. You’d be able to create a Mr. Stark, I don’t feel so good scene in no time!
Dynamic LED Light Show
In this tutorial you get to create a motion graphic piece targeted at brilliant LED lights.
The early work starts simply with the star primitive and the cloner object to create the main 3D object. This quickly gets more advanced with adding a universal gradient to your clones with the help of the Mograph color shader.
In addition, the main animation is driven by a material with the alpha slot enabled so you’ll work a lot with materials.
In the process you’ll also learn how to stack multiple cloner objects and troubleshoot adding the effector to Mograph objects manually. Finally you’ll render the scene in the Physical Render Engine with the depth of field enabled.
Cel Shading in Cinema 4D
Cel or toon shading is a subset of non-photorealistic rendering.
With this shading method you can create a 2D style with the ease and precision of a 3D scene. You’ll have an in-depth introduction to the sketch and toon effect all within this video.
It covers a dedicated render setting in Cinema 4D which is unique to the software.
Unlike other more difficult workflows, cel shading almost always renders in an instant since it does not compute a lot of rays.
Throughout this video you will be using the Sketch and Toon Cel Shader (not to be confused with the Sketch and Toon render settings). You’ll learn how to create a lighting setup to bring out the 2D form of your 3D scene.
Another technique of cell shading is also to use the fall-off shader to control the range of shadows and highlights. Lots to cover about this incredible lighting technique.
C4D Jelly
So this is a fun small project and great for beginners who want to create a finished piece.
You’ll be creating a jelly blob with the use of the pen tool and the lathe object. The most exciting part is animating the secondary motion not by hand, but procedurally.
To complete this project you’ll use a vertex weight and add it to the jiggle deformer. This effect can also be used for animated VFX such as simulating a character’s beer belly!
You can also download the full source files to practice over & over again.
Particle Emitters
With this guide you’ll learn how to use Cinema 4D’s built-in emitter object to create particles.
You’ll control the particle flow using forces such as the rotation force and a few other settings. You’ll also use the tracer object to generate trails and later use it to generate polygons.
In creating this scene you’ll make your own camera with a protection tag to prevent any unexpected movements.
If you’re looking for a more advanced particle system you can check Thinking Particles (also shipped with Cinema 4D) or an external plug-in such as X-particles which has been a standard of particle work for a decade now.
iPhone X 3D Model
From an iPhone blueprint you’ll recreate a complete Apple iPhone X 3D model all from scratch.
You’ll learn how to spot details worthy of a product shot and create them on the fly.
In the process you’ll utilize the reference feature in the viewport so you can model the phone accurately.
To create details such as the audio and charge port you’ll be using the boole object to create holes. You’ll also use splines and the extrude object to create extra details. Definitely a tutorial worth watching if you’re interested in production art.
Abstract Mesh Fractal Array
Apart from the low poly trend there’s also the abstract trend in the Cinema 4D community.
If you wanna practice some abstract art you can follow this tutorial with the platonic primitive and some other nifty techniques. To add details you’ll use the moextrude, atom array, smoothing, and bevel deformers.
You’ll also learn how to create a proper order of modifiers and deformers, otherwise you’ll get a different look.
Finally you’ll light the scene by the environment object and a simple light object.
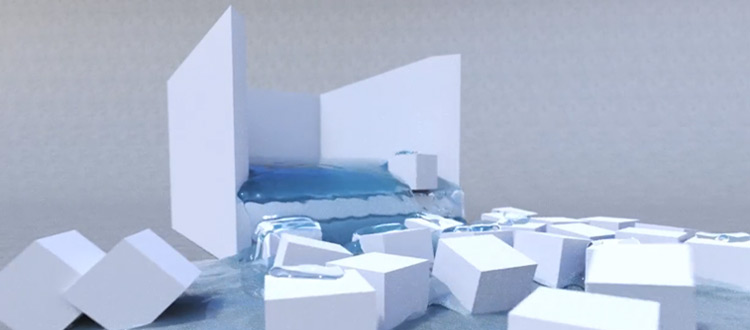
Water Condensation
In this three-part tutorial series, Chad Ashley from the Greyscalegorilla walks you through how to create droplets around a soda can using mograph from start to finish.
You’ll be using the cloner object with the distribution set to surface. You’ll also create a pseudo push effector using the displacer deformer. And you’ll render the whole scene using Arnold.
It is a fairly long series but to finish it all be sure to check out part 2 and part 3.
Fortnite RPG Modeling & Texturing
Fortnite: there’s no getting around its popularity so we may as well add it to our learning regimen.
Here you’ll learn to create an RPG model based on Fortnite’s 3D style.
The model is mostly based in the cylinder primitive so it’s easy to get started. You’ll be using different perspectives to model the object and several commands to complete the task like the optimize, chamfer, and bevel commands.
You’ll also be using the bend deformer for a procedural rendering setup. Lastly you’ll texture the model such by adding scratches all within Cinema 4D.
Dynamic Chain
Here we have another dynamics tutorial with lots of detail.
This one’s a little more complicated than the previous tutorials as you’ll be dealing with several objects colliding at the same time.
In the first part you’ll model a chain using a torus, cloner, and a step effector.
The author also gives some pointers on optimizing your simulation such as having only necessary polygon details. In the second part you’ll add dynamics and adjust simulation settings in the collision tab.
Make a Rock Mountain
Landscapes are a technical subject matter and well worth practicing for digital art.
Fortunately you don’t need to model or sculpt a landscape. Cinema 4D comes in with a landscape primitive where you can easily adjust parameters such as sea level and plateau level to get the desired look fast.
You’ll texture the object procedurally to automatically determine the highs and peaks of the mountain. This means should you change the look of the landscape as you go along, there will be little to no changes to the texture. How cool!
The texture is created using the fusion shader, noise map, and several bump textures all at once.
To complete the project you’ll create an advanced lighting setup with a volumetric effect and ultimately render the scene with ambient occlusion.
Low Poly Factory Scene
In this low poly tutorial you’ll create a complete factory scene.
Even if you have no interest in the low poly look, modeling this way is a good exercise in learning to reduce the complexity of any form. You can think of it as a gesture drawing for the digital artist.
Throughout the video you will learn several techniques such as calling the commander (Shift+C) to execute commands on the fly. You’ll also use quantize for accurate modifications and the bend deformer for a realistic looking arc figure.
Softbody Dynamics with Mesh Deformer
Dynamics are inherently slow. Even if you have dual Xeons running at top capacity, the viewport will still not play at real time.
A decent workaround is to perform dynamics on a low poly model and transfer it to a high poly object. How?
With the Mesh Deformer of course!
In this tutorial you’ll be using a dinosaur mesh from the content browser. The workflow is to create a rudimentary low poly representation of the high poly object.
In this case you’ll be using a sweep object with a rail spline. There is no need to be detailed as the low poly will not be for rendering, but only for calculation. The low poly will serve as our cage.
Throughout the tutorial you’ll add the mesh deformer, collider, and soft body tag. You’ll also modify soft body settings such as structural, damping and stiffness to get the desired outcome.
Deforming & Animating a Sphere
In this official Maxon tutorial you’ll create an abstract animation that deforms a sphere using the displacer deformer.
The key effect here is the noise map where Cinema 4D offers substantial options that can be presented in handy thumbnails.
You’ll be modifying several setting such as the global scale of the noise and the strength of the deformer. You’ll then isolate the effect using a fall-off feature and a few other nifty techniques.
Using The Mograph Sound Effector
Animating by hand surely has its place. But what if you’re in a tight deadline and you just need to create a motion on a beat?
Worry no more! Sound Effector is here to help.
Like other effectors, sound effector comes with the usual flavors of modifying the position, scale, and rotation with the option to isolate effects through fall off or a Mograph selection.
And with this guide you’ll experience the power of using the sound effector by creating keyframes based on sound. With recent versions of C4D you can even separate the highs and lows of audio waves.
C4D Studio Lightning Set
Ever wondered how artists manage to light product shots realistically?
One of the main factors is that they create setups that mimic real life. In this tutorial you’ll create a studio lighting that will be ideal to close and mid-close up product shots.
You’ll create the main object from a primitive with the help of the subdivision surface. You’ll also be modifying shadows fall-off to simulate actual light behavior and also use a target tag to maintain focus while moving lights.
And if you’re in a rush or want to use this down the road you can buy the author’s premade studio lighting set up here.
Chess Set in Octane Render
So it’s worth mentioning this tutorial doesn’t exactly create an entire chess set, only the pawn piece.
However the tutorial doesn’t need to go much further than that!
Throughout the process you’ll learn the essential workflow in creating any piece such as using the lathe object and bevel command.
In the second part you’ll learn how to texture your models by adding fingerprints and scratches. You’ll then render the scene with an external plug-in Octane with a depth of field.
Collision Deformer
Cinema4D offers several deformers for easier modeling. These deformers are akin to 3ds Max’s modifier so they’re easy to learn if you have a background there.
But if you don’t it’s still easy to pick up with this tutorial. The collision deformer is less accurate than the soft body simulation but it is faster to calculate and the main focus of this video.
Here you’ll explore theories behind the deformer and its corresponding challenges. You’ll also add a jiggle deformer with a fall-off to ease out the effect.
Later you’ll learn how to execute camera projection to apply the deformer to a picture. You’ll also practice how to use the camera calibrator and generate a UVW map from the camera mapping texture.
Melt Deformer
Here’s a fun little exercise using a melt deformer to create a 3D model of melting cheese.
The melt is not simulated but generated semi-procedurally. This means you will not have much heavy calculation overhead, thus giving a much faster iteration.
You’ll later use the sculpt toolset such as the grab brush to fine tune the desired look you want. You’ll also use the pull tool to create holes.
Because really, what’s cheese without holes?
Triggering Dynamics The Easy Way
This tutorial is aimed more for intermediate users of Cinema 4D familiar with rigid body dynamics.
As such, if you are new to rigid body dynamics check EJ’s dedicated tutorial on the matter.
Normally when you apply rigid body dynamics it activates immediately when you hit play. In this tutorial you’ll learn how to control rigid body dynamic’s activation for art direction.
Make Materials & Shaders Look Realistic
Curious how to make photo-realistic materials?
Check out this awesome tutorial to learn the fundamentals all within C4D.
Some of these practice exercises are obvious such as building the scene digitally in real-world scale. But some are not so obvious, such as designing all colors and avoiding full white or full black.
Using the built-in render engine you’ll explore several materials with chrome, plastic, shiny/reflective surfaces, and transparent characteristics with the Beckmann algorithm to simulate microsurfaces.
Mograph Time Effector Intro
One reason Cinema 4D stands out from other programs is its Mograph module.
Part of the mograph module is the effectors. Think of them as batch automation animators. Here you’ll learn all about effects such as the time effector, where animation is based solely on the passage of time.
Of course, effectors by themselves mean nothing. As such you will use the voronoi fracture to break objects alongside the random effector to stack different kinds of movements.
Build An Animated Dynamic Character
In this greyscalegorilla tutorial you learn how animate a character based on motion capture and add dynamic characteristics.
You’ll start creating your character from the joint to polygons command. You’ll then use the cloner to populate your character.
Throughout the process you’ll learn how to troubleshoot this complicated workflow such as rearranging the object hierarchy. For texturing and rendering Nick demonstrates how to use their HDRI studio and Topcoat for a more streamlined workflow.
Intro to UV Mapping with Bodypaint
Every program has its share of weakness.
In the case of Cinema 4D it’s UV Mapping. You’d be better off with dedicated software’s such UV Unfold to handle that task.
Note you can use C4D’s UV process, it is functional but not as fast as other software.
However if you’re UV mapping for simple to moderately complex meshes Cinema 4D can get the job done nicely.
Follow along to learn the unwrapping workflow and the corresponding challenges you’ll face inside Cinema 4D.
Dripping Gooey Slime
Learn to create a dripping liquid slime through modeling rather than simulation. You’ll achieve this with simple and advanced techniques.
The base shape will be a semi-sphere with several poly extrusions. You’ll also use the subdivision surface and smoothing deformer to clean out the mesh.
For the animation you’ll be dealing with the pose morph tag. To drive the morphs you’ll use joints and the mesh deformer. Near the end of this video you’ll be creating a material with the transparency enabled to practice some material workflows.
Photo-Based Modeling
Apart from the mograph module, Cinema 4D also excels at camera mapping. This is one area well worth learning if you have the time.
So in this tutorial you’ll learn how to model objects that can be used for camera mapping fast.
You’ll start by blocking the right proportion and studying how camera mapping works. You’ll add depth with the extrude command as well.
With the use of the polygon pen and knife tool you’ll also create polygon cuts for stairs and windows. The author shares a bunch of really helpful pointers on how to manage your UVs all within C4D.
Looping Background
With a looping animation it might seem like you’d need a hefty amount of technical skills to match the first and last frame.
But Cinema4D makes this easier with a simple setting. In this tutorial you’ll build a hexagon looping background that that can serve as a decent CG background while not appearing too boring or busy.
The main object is based on a honeycomb array with lots of customization. You’ll apply a shader effector in a Z-axis direction and study how this effector changes the scene.
For the looping period you’ll set the noise animation speed at 0.6 with the loop period parameter enabled and learn how to master that seamless looping experience.
AR Glitch Effect
The glitch effect has been overdone with several After Effects templates out there.
However AE is limited in 2D or 2.5D space. In this tutorial you’ll learn how to apply the glitch effect in 3D space inside Cinema 4D.
While the set-up is not as simple in After Effect’s drag and drop workflow, you’ll learn a workflow that can be applied to several scenarios within C4D.
You’ll first prepare the textures in Photoshop with the alpha channel enabled. For the main object you’ll use the voronoi fracture. Then for the animation you’ll use noise driven by a randomness seed.
Next you’ll integrate live footage for the motion tracker and later work on compositing the scene.
The exciting part about this animation process is that it’s only driven by 2 keyframes. No painstaking done-by-hand labor!
Model & Animate a Forklift
In this more advanced tutorial you’ll learn how to model and animate a low poly forklift from scratch.
To be accurate: you’ll use a reference image that can be imported to Cinema4D’s viewport which does make the process a bit easier.
You’ll also use several views to manipulate the object.
Throughout this guide you’ll use several commands such as the bevel tool and loop cut with the precision of Cinema 4D’s interactive screen controls.
You’ll also be introduced to polygon and edge snapping for a streamlined C4D workflow. The author also reminds you that simple materials are more than enough for this type of work. Keep that in mind as you continue working with C4D in future projects.
Author: Ben Traje
Ben is a stylized character rigger based in Davao City, Philippines. Proficient in Maxon, Cinema4D, and Autodesk Maya, he's available for remote freelance work with plenty of samples in his portfolio.
")


